


Creating an effective landing page is one of the keys to the success of any website, and Elementor, as a powerful page builder, provides a wealth of tools and templates to help users easily build visually appealing landing pages with excellent user experience. In this article, we will discuss how to use Elementor to build an effective WordPress landing page, from page layout configuration to adding various kinds of functional areas, fully covering the steps and tips needed.
![图片[1]-如何使用 Elementor 构建高效的 WordPress 着陆页-光子波动网 | WordPress教程、Elementor教程与故障修复](https://www.361sale.com/wp-content/uploads/2024/08/2024081703222621.png)
I. Common parts of a landing page
Building an effective landing page first requires clarifying its components. While landing pages may vary from one to the next depending on the purpose and content, there are a few common sections that are usually included:
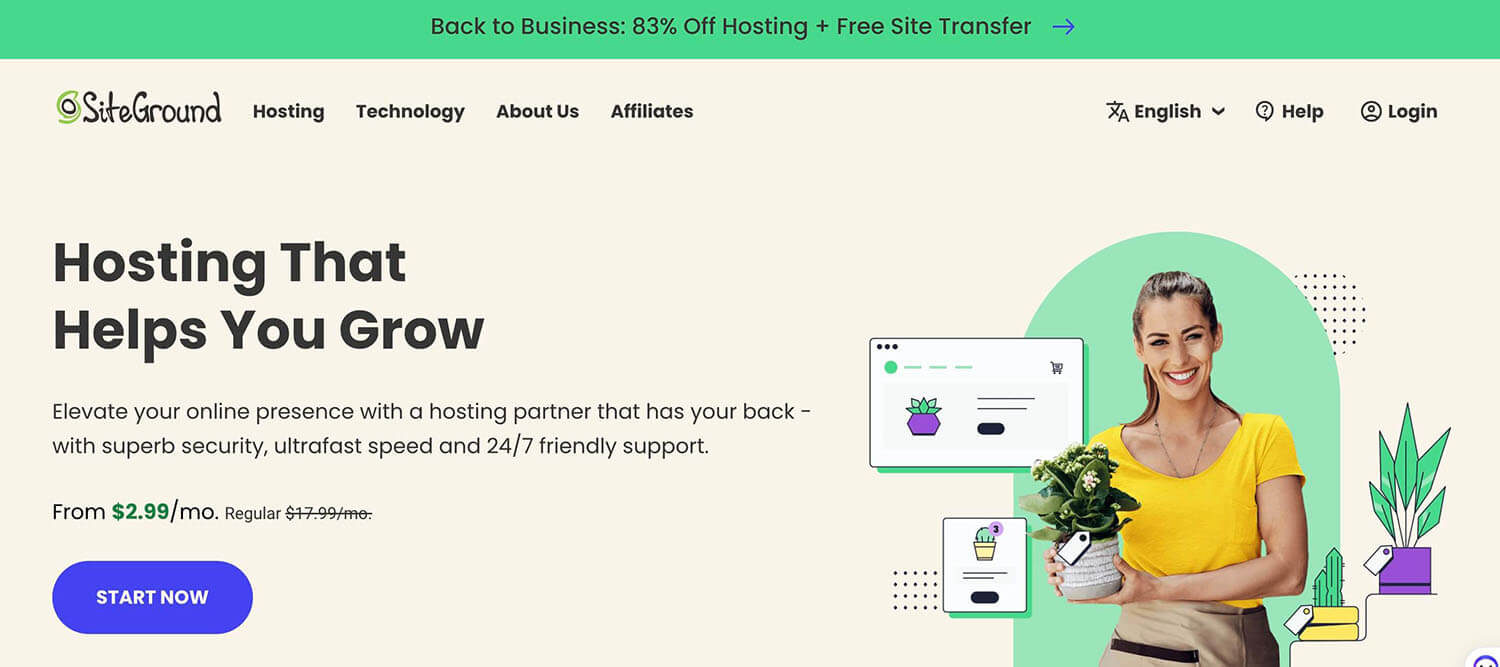
- Hero section
This is the first part of the page that visitors see when they enter the page. It usually includes a compelling headline, subheading, descriptive text, and a clear call-to-action (CTA) button. The design of this section directly affects the user's first impression, so extra attention needs to be paid to the copy and visuals. - navigation menu
While the goal of a landing page is usually to direct users to a specific action, a navigation menu is still essential for users interested in exploring further. A clean navigation menu can help users quickly find the information they need. - About Us
This section is used to share more detailed information about your business or services. Help visitors better understand and trust your brand by describing your company's background, mission, and core values. - Featured Showcase
Demonstrate the core benefits of your product or service through beautiful images and persuasive text. Ensure that the content clearly communicates the unique selling points of your product and captures the user's interest. - image archive
Showcase your product or program in the form of an image, video or gallery. This not only presents your product visually, but also adds to the visual appeal of the page. - Forms section
Add a contact form to make it easy for users to get in touch with you. This is a key step in collecting information from your users and following up further. - Customer testimonials
Add customer testimonials or user reviews as a way to demonstrate the value and quality of the service. These testimonials can help build trust with potential clients and increase conversions. - footers
The footer, while not required, can contain useful links such as the privacy policy, terms of service, FAQ (Frequently Asked Questions), etc. to provide users with more information.
How to Build a Landing Page in WordPress Elementor: A Step-by-Step Guide
1. Configure page layout, global fonts and color schemes
Before embarking on the creation of a landing page, you first need to configure the layout, global fonts, and color scheme of the page. This will ensure a consistent style throughout the page and enhance the user experience. The specific steps are listed below:
- Creating a new page and enabling Elementor editing
Go to the WordPress backend, navigate to Pages >> Add New Content and select Edit with Elementor.
![图片[2]-如何使用 Elementor 构建高效的 WordPress 着陆页-光子波动网 | WordPress教程、Elementor教程与故障修复](https://www.361sale.com/wp-content/uploads/2024/08/2024081702144136.png)
- on-pageSelect "Elementor Canvas" as the page layout from the Elementor settings in the lower left corner and publish the page. This way, your page will only display the content created by Elementor and will not contain a header, footer or sidebar.
![图片[3]-如何使用 Elementor 构建高效的 WordPress 着陆页-光子波动网 | WordPress教程、Elementor教程与故障修复](https://www.361sale.com/wp-content/uploads/2024/08/2024081702095126.png)
- Setting global colors and fonts
Go to Site Settings and define primary, secondary, text and accent colors. These global settings will be automatically applied to any new widgets you add in the Elementor workspace, ensuring a uniform page style.
![图片[4]-如何使用 Elementor 构建高效的 WordPress 着陆页-光子波动网 | WordPress教程、Elementor教程与故障修复](https://www.361sale.com/wp-content/uploads/2024/08/2024081702353276.png)
2. Creating heroes section
The hero section is the key area that attracts the attention of the visitor. Hero sections can be created using Elementor in two ways:
- Method 1: Create the hero section from scratch
Use Elementor's drag-and-drop feature to drag and drop desired widgets, such as headings, subheadings, images, or videos, into the workspace. It is recommended that you choose a two-column layout so that you can display the headings and associated images or videos side-by-side. Use H1 tags for the main headline and H2 or H3 tags for the subheadings to not only enhance the visual effect, but also to improve SEO performance.
![图片[5]-如何使用 Elementor 构建高效的 WordPress 着陆页-光子波动网 | WordPress教程、Elementor教程与故障修复](https://www.361sale.com/wp-content/uploads/2024/08/2024081702385988.png)
Add call-to-action buttons: To entice your visitors to take immediate action, add visually appealing (CTA) buttons by:
- Click the ElementsKit icon in the Elementor contents section.
- Select "Call to action" from the available section categories.
- Select an action button from the selection and click Insert.
- Customize content, style and layout as needed.
![图片[6]-如何使用 Elementor 构建高效的 WordPress 着陆页-光子波动网 | WordPress教程、Elementor教程与故障修复](https://www.361sale.com/wp-content/uploads/2024/08/2024081703061229.png)
- Method 2: Use Elementor's pre-designed hero part
For those who are new to Elementor, it is possible to save time and ensure design quality by selecting a Hero section from a collection of pre-designed templates. Simply click "Add Template", navigate to "Blocks", select the "Hero" block and insert it into the page, then customize it as desired.
3. Construction of the navigation area
Elementor provides a variety of ways to create navigational regions, here is a simple way to create a navigational region using Elementor and ElementsKit:
- Method 1: Use Elementor Professional Edition
First click on "Add Template", then select the "Title" block and insert it into the page. Customize the title content and style according to your needs.
![图片[7]-如何使用 Elementor 构建高效的 WordPress 着陆页-光子波动网 | WordPress教程、Elementor教程与故障修复](https://www.361sale.com/wp-content/uploads/2024/08/2024081702510554.png)
- Method 2: Using ElementsKit
Click "ElementsKit"Icon, select "Section" and choose the "Title" block from the category. Once inserted, customize the design. If you do not want the navigation area to be displayed all the time, you can set it to hide the navigation menu when the user scrolls to a certain position on the page.
![图片[8]-如何使用 Elementor 构建高效的 WordPress 着陆页-光子波动网 | WordPress教程、Elementor教程与故障修复](https://www.361sale.com/wp-content/uploads/2024/08/2024081702471494.png)
4. Creation of an "About" section
"The About section can also be built using Elementor's pre-designed templates or from scratch. The steps are as follows:
- Using Elementor Pre-Designed Blocks
Click "Add Template", navigate to "Blocks", select the "About" block, insert and customize the content.
![图片[9]-如何使用 Elementor 构建高效的 WordPress 着陆页-光子波动网 | WordPress教程、Elementor教程与故障修复](https://www.361sale.com/wp-content/uploads/2024/08/2024081702493963.png)
- Enhancing the About section with ElementsKit
ElementsKit provides a rich set of design elements to enhance the About section by adding team photos, related videos, and more.
![图片[10]-如何使用 Elementor 构建高效的 WordPress 着陆页-光子波动网 | WordPress教程、Elementor教程与故障修复](https://www.361sale.com/wp-content/uploads/2024/08/2024081702500688.png)
5. Design of featured display areas
The featured area of a product or service is one of the most important parts of a landing page. It can be created quickly with Elementor's pre-designed "Feature" block:
- Select and insert the pre-designed "Feature" block.
Click "Add Template", navigate to "Blocks", select the "Feature" block and insert it into the page. Then customize the design according to your product features.
6. Creation of gallery areas
Adding a gallery to a landing page allows you to visually display a product or item, here's how to do it:
- Using Elementor's Gallery Widgets
In Elementor's workspace, search for the "Gallery" widget and drag and drop it onto the page. Then customize the layout and settings to fit your design.
![图片[11]-如何使用 Elementor 构建高效的 WordPress 着陆页-光子波动网 | WordPress教程、Elementor教程与故障修复](https://www.361sale.com/wp-content/uploads/2024/08/2024081703122116.png)
- Creating a Video Library
If you need to create a video library, you can use the video library widget provided by ElementsKit, just drag and drop it onto the page and set it up.
7. Adding contact areas and contact forms
Contact forms are an important tool for connecting with your users. Customized forms can be easily created using Elementor Pro's form widgets:
![图片[12]-如何使用 Elementor 构建高效的 WordPress 着陆页-光子波动网 | WordPress教程、Elementor教程与故障修复](https://www.361sale.com/wp-content/uploads/2024/08/2024081703150455.png)
- Drag and drop form widgets
In the Elementor editor, drag the form widget to the page. Use the available controls to customize the form content, add the required fields, and adjust the layout to ensure a responsive design.
8. Adding social proof through client referrals
Customer testimonials are an effective way to increase trust. Here's how to add a testimonial section using Elementor:
- Use the referral widget or referral block
Search for and add "Testimonial" widgets in Elementor, or choose from pre-designed recommendation blocks. Customize the content, style and layout to match the overall style of the page.
![图片[13]-如何使用 Elementor 构建高效的 WordPress 着陆页-光子波动网 | WordPress教程、Elementor教程与故障修复](https://www.361sale.com/wp-content/uploads/2024/08/2024081703163871.png)
- Use the recommended sections provided by ElementsKit
Click on the "ElementsKit" icon, select the "Recommendations" section, insert and customize as needed.
Practical tips for using Elementor to build high-converting landing pages
Building a landing page is more than just adding individual sections, it needs to be strategically designed to increase user conversions. Here are some practical tips:
- Select Related Images
Make sure to use images that are high quality, load quickly and are relevant to the content. The quality and relevance of images directly affects the user's perception of the brand and has a significant impact on conversions. - Add Form
Use clean, easy-to-use forms to collect user information and avoid complex fill-in processes. Progressive fields and custom error messages can help improve the user experience. - Keep the design simple
Focus on a single conversion goal, whether it's increasing signups or promoting a product. A simple design directs users to focus on core content and avoids information overload. - Writing compelling copy
Copy should be clear and direct, using active voice and strong CTAs to motivate users to act. Highlight the benefits of the product, rather than just describing features, to address the user's actual needs. - Establishing a clear call to action
CTAs should be visually appealing and clearly tell the user what to do next. Layout CTA buttons wisely and track clicks for optimization.
IV. Frequently asked questions
![图片[14]-如何使用 Elementor 构建高效的 WordPress 着陆页-光子波动网 | WordPress教程、Elementor教程与故障修复](https://www.361sale.com/wp-content/uploads/2024/08/2024081703201881.png)
How do I add an FAQ section to my Elementor landing page?
FAQ widgets or pre-designed blocks provided by Elementor or ElementsKit can be used:
- Method 1: Use Elementor's FAQ block
Click on "Add Template", select the "FAQ" block and insert the page to customize it as necessary. - Method 2: Using ElementsKit's FAQ section
Click on the "ElementsKit" icon and select the "FAQ" section to insert and customize the style.
How do I add a countdown timer to my landing page?
A countdown timer is an effective tool for enhancing a sense of urgency, and here's how to add it:
- Using the Countdown Timer Widget from ElementsKit
Search for "Countdown Timer" in Elementor, select and insert the Countdown Timer widget, customize the style and settings.
Are there any free or premium themes compatible with Elementor for creating WordPress landing pages?
![图片[15]-如何使用 Elementor 构建高效的 WordPress 着陆页-光子波动网 | WordPress教程、Elementor教程与故障修复](https://www.361sale.com/wp-content/uploads/2024/08/2024081703211026.png)
Here are a few WordPress themes that are compatible with Elementor and perform well:
- Astra
Lightweight and highly customizable, it's one of the most popular WordPress themes and is more than recommended!Astra ProThe - GeneratePress
Extremely fast loading and customizable for use with Elementor. - Neve
The clean design and compatibility make it especially suitable for creating efficient landing pages. - OceanWP
Offering rich layout options and powerful customization features, it is the preferred choice of many users.
V. Summary
Elementor is a powerful tool that helps you build effective landing pages with ease. With the detailed guide in this article, you should now have the knowledge and skills to build a complete landing page from start to finish. Whether it's adding a hero section, setting up a navigation menu, or creating a contact form and customer testimonials, these steps will help you build an engaging and converting landing page.

Link to this article:https://www.361sale.com/en/16984/The article is copyrighted and must be reproduced with attribution.


![表情[wozuimei]-光子波动网 | WordPress教程、Elementor教程与故障修复](https://www.361sale.com/wp-content/themes/zibll/img/smilies/wozuimei.gif)
![表情[baoquan]-光子波动网 | WordPress教程、Elementor教程与故障修复](https://www.361sale.com/wp-content/themes/zibll/img/smilies/baoquan.gif)


No comments