


Magento 2 is a very powerful e-commerce platform, but its server requirements are more complicated, especially the need to pass the Composer (which is a PHP Package Management SystemThis is not the default configuration on many platforms. If you want to set up a local development and testing environment, you can use XAMPP, a free and open source cross-platform web server solution.
![图片[1]-如何在本地用 XAMPP 安装和配置 Magento 2](https://www.361sale.com/wp-content/uploads/2024/11/20241128145948132-image.png)
Benefits of running Magento 2 locally
There are many advantages to installing Magento 2 locally, including:
- save costs: No need to purchase a dedicated server.
- Offline Development: Web sites can be developed and tested without an Internet connection.
- safety test: Test new features or extensions without disrupting the production environment.
- custom development: All sorts of customizations can be made with confidence without causing the actual site to crash.
- Faster performance: Due to the absence of network latency, local environments are usually more responsive than remote servers.
- safety: Prevent unauthorized access and hacking.
- Easy Backup and Restore: Local sites can be quickly backed up and restored, reducing risk.
Local Installation Requirements for Magento 2
Before installing Magento 2, you need to ensure that the following components and system configurations are met:
- Apache/NGINX version 2.2 or 2.4
- PHP version 7.4.x or 8.1.x
- MySQL/MariaDB Version 5.6.x, 5.7.x or Maria DB
- Elasticsearch 7.6.x or later
Installing and setting up XAMPP
How to install Magento 2 locally.
Step: 1 Download the XAMPP server
Go to Apache Friends andDownload XAMPP ServerThe

Magento strongly recommends installing XAMPP and PHP version 8.1.x for M2.4.5. Additionally, Magento 2.4 and PHP 7.3 can be installed, but are not tested or recommended.
Step: 2 Install XAMPP
After downloading XAMPP, double-click the file to install it on your computer.
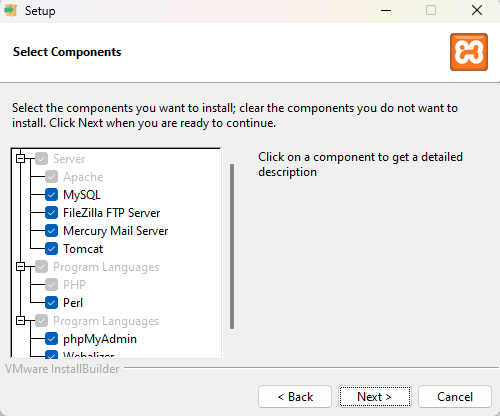
click (using a mouse or other pointing device)the next stepButton.

Retain the default selections in the diagram. Click thethe next stepButton.
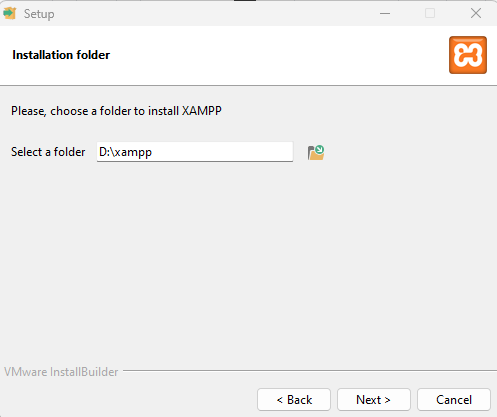
Select the installation folder. The default location isC:\xampp But it is recommended to choose according to your convenienceC:\A directory other than the drive, such asD:\maybeE:\ .
If you need to make changes, clickskim overicon to change the target location of the XAMPP program, and then click thethe next stepbutton to go to the next step.
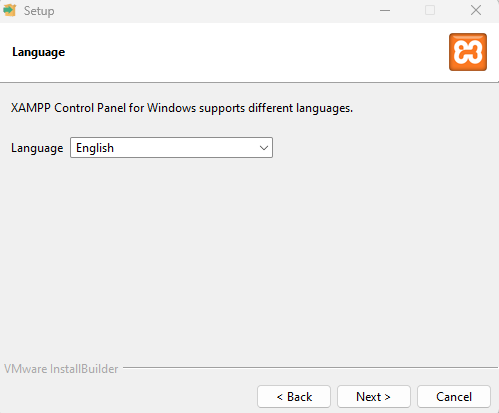
click (using a mouse or other pointing device)the next stepButton.
click (using a mouse or other pointing device)the next stepButton.
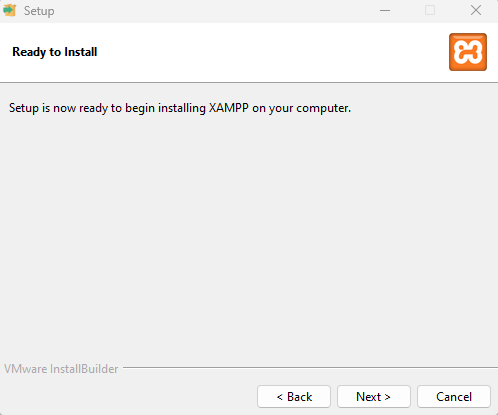
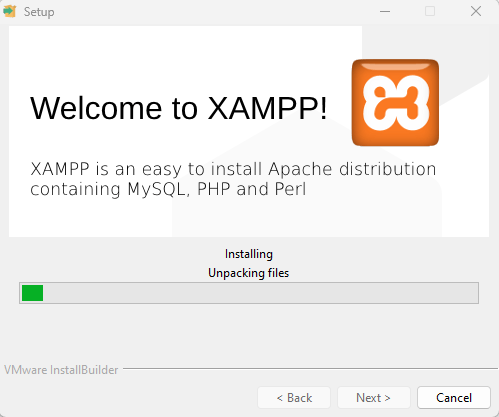
Wait for the installation wizard to install XAMPP on your computer.
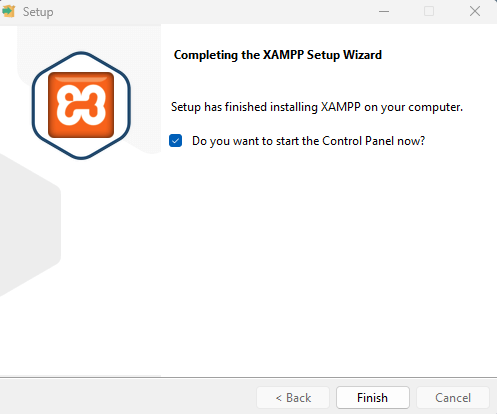
After the installation is complete, you will see the option "Should I start the control panel immediately? ". Keep it selected. Click the"Finish."Exit the installation and go toXAMPP Control PanelThe
Step: 3 Configure PHP
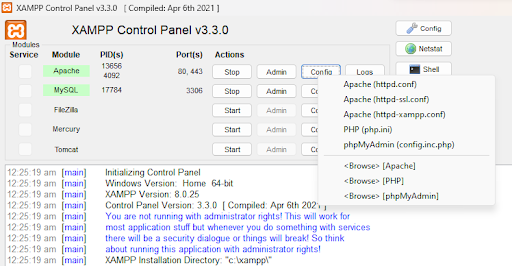
In the XAMPP control panelIn theApachemobileconfigurebutton, and then click thePHP (php.ini)The
In php.iniIn the file, find the following lines and delete the semicolon before each line ::
;extension=intl
;extension=soap
;extension=sockets
;extension=sodium
;extension=xsl
;extension=gd
Expand memory_limit to 4G:
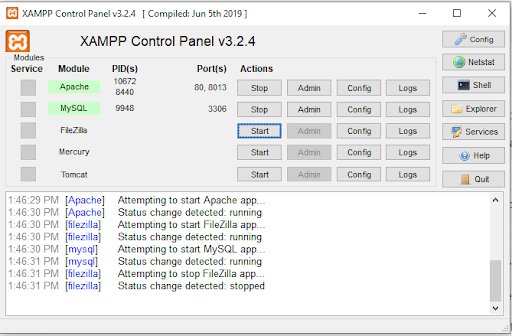
memory_limit=4GWhen you are done, save and close the file. Then, click on the Apache and MySQL lines on the "commencement" button to start them. Don't quit XAMPP after this step, just let it run.
Step: 4 Configure the Hosts file
Access CatalogC:\Windows\System32\drivers\etc\hostsThe
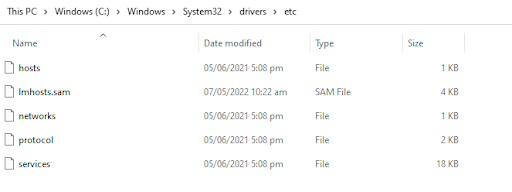
Add the following line to the last line:
127.0.0.1 www.localhost.com

show (a ticket)XAMPP Control Paneland initiateApacherespond in singingMySQLApps.
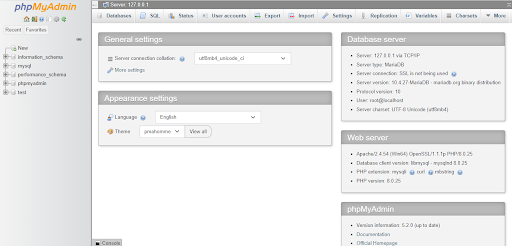
Creating a database in phpMyAdmin
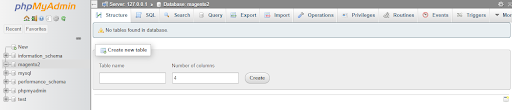
Access URL http://localhost/phpmyadminTo create a database, enter the name of the database (e.g., Magento2) and click Create Database. Enter a database name (for example, Magento2) and click theestablishThe
click (using a mouse or other pointing device)the next stepbutton to create a database.

The database was created successfully.
Attention:Remember the name of the database you want to create, as you will need to install Magento on it later.
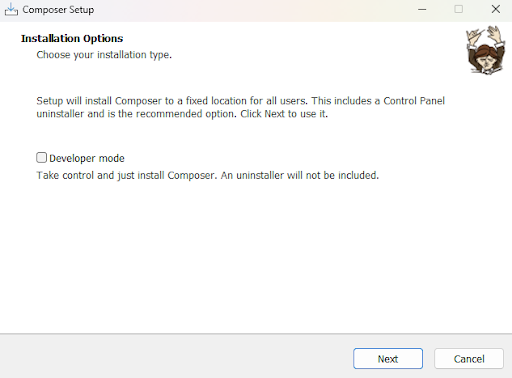
Installing Composer for Magento
The latest version of Magento, Open Source 2.4.0 and above, is compatible with Composer 2. So, you need to install Composer 2 to download the latest version of Magento 2.
The best way to do this is to download and runComposer-Setup.exeThis will install the latest version and set up a new version from any directory. This will install the latest version and setup from any directory "The path to the "Composer" call.
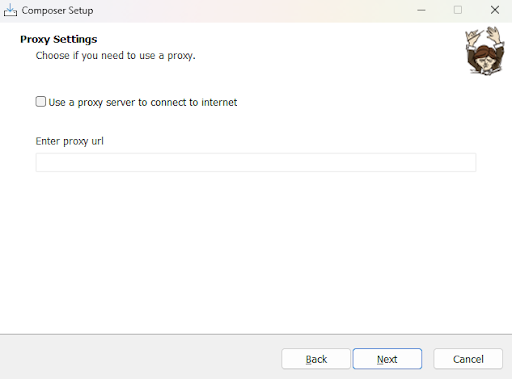
click (using a mouse or other pointing device)the next stepbutton and browse for the PHP path in the XAMPP folder.

Optionally, you can enter a proxy URL.
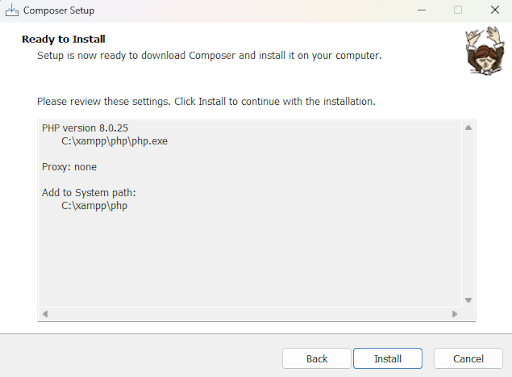
click (using a mouse or other pointing device)"Installation"button for the final step.
click (using a mouse or other pointing device)the next stepButton.

click (using a mouse or other pointing device)fulfillmentButton.

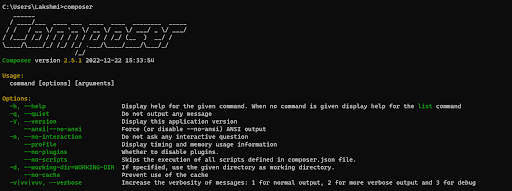
activate (a plan)command prompt (computing)and run the Composer command to verify that it is installed without any problems.
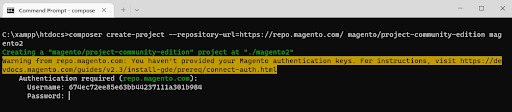
Downloading Magento with Composer
Next, cd toC:\xampp\htdocsand use Composer to run the following command to download a specific Magento 2 version.
composer create-project --repository-url=https://repo.magento.com/ magento/project-community-edition=2.4.5Magento Open Source
composer create-project --repository-url=https://repo.magento.com/magento/project-community-edition:2.4.5Adobe Commerce (Enterprise Edition)
composer create-project --repository-url=https://repo.magento.com/magento/project-enterprise-edition:2.4.5With the above command, you can specify the specific version of Magento (2.0, 2.1, 2.2.1, 2.2.2, 2.2.3, 2.2.4, 2.2.5, 2.2.6, 2.3, 2.4). If not, skip the version and run the following line directly:

Next, enter your Magento authentication key.public keyrespond in singingThe private key is in theMagento Marketplace AccountCreate and configure it in the Locate the account name in the upper right corner of the page and select theMy ProfileThe
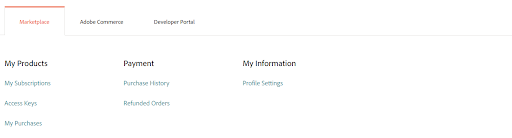
Next, click"The market."tab of theaccess keyThe

click (using a mouse or other pointing device)"Create new access key".Enter a specific name for the key (e.g., the name of the developer receiving the key) and click "recognize".
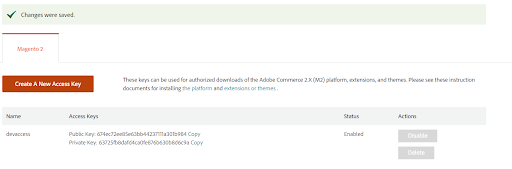
Copy the user name in thepublic keyand in the passwordprivate key to install Magento.
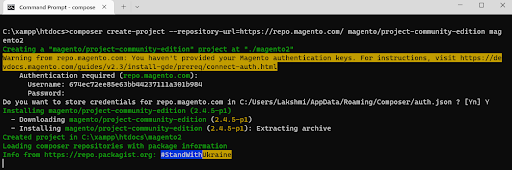
The writer takes a while to download and install all the necessary modules. Once it's all done, you can see these below:

Installing Elasticsearch for Magento 2
Elasticsearch is the recommended extension for Magento version 2.4.X.
Download Elasticsearch 7.6.0:https://www.elastic.co/downloads/past-releases/elasticsearch-7-6-0(Magento 2.4.x has only been tested with Elasticsearch 7.6.x. Other 7.x versions can be used at your discretion, but a tested version of Elasticsearch is recommended.)
Extract the .zip file you just downloaded. In a terminal window, go to the extracted directory and run the following command:
. \bin\elasticsearch.batAlso check port 9200Availability of Elasticsearch on the Web. In your browser, typelocal:9200The following is a summary of the installed Elasticsearch extensions.
{"name" : "DESKTOP-Jyoti", "cluster_name" : "elasticsearch", "cluster_uuid" : "ONNrUlTWQCSoigYBy6WF9g", "version" : {"number" : "7.9.3", "build_ flavor" : "default", "build_type" : "zip", "build_hash" : "c41E4fgiueQSoiytrBW", "build_date" : "2023-02-02T09:51:41.449Z", "build_snapshot" : false, "lucene_version" : "8.7.0", "minimum_wire_compatibility_version" : "6.8.3", "minimum_index_compatibility_version" : "6.8.3"}," tagline" : "You Know, for Search"}Install Magento 2 with the command
Open a command prompt window. Next, go to the Magento directory and execute the following command:
php bin/magento setup:install --base-url="http://localhost/magento2/" --db-host="localhost" --db-name="dbmagento241" --db-user="root" -- admin-firstname="admin" --admin-lastname="admin" --admin-email="[email protected]" --admin-user="admin" --admin-password="admin123" -- language="en_US" --currency="USD" --timezone="America/Chicago" --use-rewrites="1" --backend-frontname="admin" --search-engine= elasticsearch7 --elasticsearch-host="localhost" --elasticsearch-port=9200Please note:Assign the base URL according to the path, and write downAdministrator User Namerespond in singingcryptographicfurthermorerefrain fromUse the Elasticsearch port.
Replace these values:
- -base-url: magento 2 installation folder
- -db-name ::Database name when creating the database
- -db-password:Database Password
- -db-user:Database user with full privileges. The default root user is usually used.
- -db-password:The password for the database user. If you use the "root"Database user, leave it blank
- -admin-firstname:Administrator Name
- -admin-lastname:Administrator's last name
- -admin-email:Administrator e-mail address
- -admin-user:The username used to log in to the admin panel
- -admin-password:Password for logging into the admin panel
- -language:The language used in the admin panel and storefront. Use the language code, e.g. en_US.
- -admin-email.Change this to the website's email
- -currency:Set the default currency used by the store. Type php bin/magento info:currency:list to get a list of supported currencies and their code
- -timezone:Change the time zone in which you are located. (e.g. Beijing time, etc.)
- -url-rewrites:Set to 1 to enable web server rewriting. This will help improve your site ranking.
- -backend-frontname:Set the site administration URL. omitting this parameter will result in a randomly generated URL for the Magento administration path (e.g. admin_jkhgdfq)
- -search-engine:Sets the version of Elasticsearch to use for this Magento installation. The default is elasticsearch7
- -elasticsearch-host: The hostname or IP address where Elasticsearch is running. The default is localhost
- -elasticsearch-port: The port number on which Elasticsearch listens. The default is 9200.
The other values are optional and you can change them later.
Now, if all goes well, Composer 2 will start installing Magento 2. This process will take about 10 minutes.
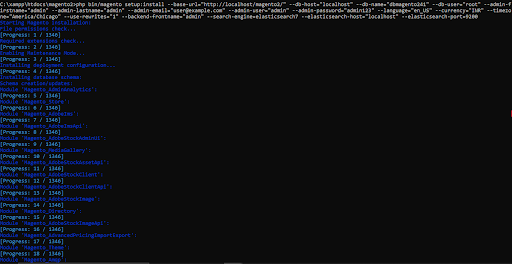
Just be patient, as it will take some time to install all the instances and setup the modules required for Magento 2.4.5.
After installing, get these:

Run command
Now, the following command needs to be run.
php bin/magento indexer:reindexphp bin/magento setup:upgradephp bin/magento setup:static-content:deploy -fphp bin/magento cache:flushNow click on the URL (usuallylocalhost/magento2/pub/) or the base URL set for base-url during installation.
For administrators: use http://localhost/magento2/pub/admin访问管理后台网址.
summarize
With the steps in this article, you can easily set up a Magento 2 environment locally for development and testing. We hope this tutorial will help you to successfully install and run Magento 2. If you encounter any problems, feel free to contact us atCommunities of exchangeLeave a message for help!

Link to this article:https://www.361sale.com/en/28113/The article is copyrighted and must be reproduced with attribution.


![表情[wozuimei]-光子波动网 | WordPress教程、Elementor教程与故障修复](https://www.361sale.com/wp-content/themes/zibll/img/smilies/wozuimei.gif)
![表情[baoquan]-光子波动网 | WordPress教程、Elementor教程与故障修复](https://www.361sale.com/wp-content/themes/zibll/img/smilies/baoquan.gif)


No comments