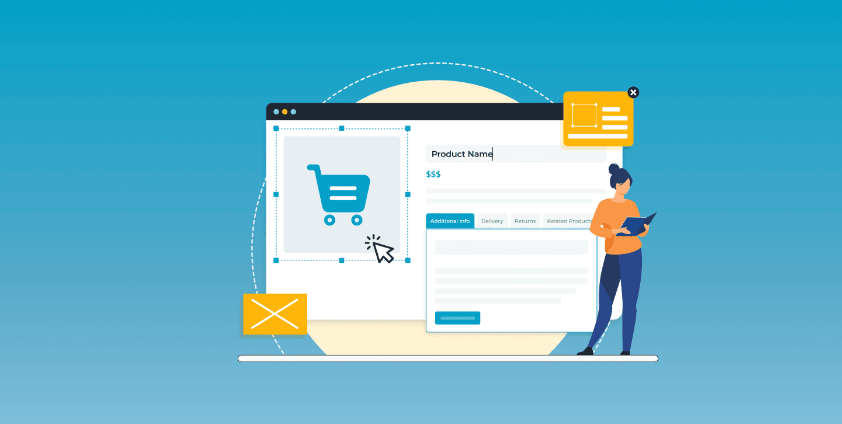


For the use of WooCommerce For store owners, the default product pages, although fully functional, are slightly lacking in branding, layout optimization and user interaction. Therefore, how to customize WooCommerce product pages to create a page that matches the brand's style and also effectively boosts the conversion rate has become the focus of every e-commerce operator's attention.
![Image[1]-Comprehensive Guide: How to Customize WooCommerce Product Pages to Boost Conversions](https://www.361sale.com/wp-content/uploads/2024/11/20241126145644653-Desti-Nation-Event-Space-2.png)
In this article, we'll give you a detailed overview of how to customize WooCommerce product pages in a variety of ways, including:
- Basics of WooCommerce Product Pages
- Method 1: Customize Product Pages with WooCommerce Website Editor
- Method 2: Extend functionality with the WooCommerce plugin
- Method 3: Deeper customization through custom code
- Method 4: Create a Unique Page Layout with a Drag-and-Drop Page Builder (like Elementor)
Whether you're an e-commerce beginner or a veteran developer, this guide will provide you with practical solutions.
Basics of WooCommerce Product Pages
What is a WooCommerce Product Page?
![Image[2]-Comprehensive Guide: How to Customize WooCommerce Product Pages to Boost Conversions](https://www.361sale.com/wp-content/uploads/2024/11/20241126144408589-image.png)
The WooCommerce product page is the place in the store where all the important information about the product is displayed. It includes
With customization, pages can be made to fit more closely with the brand's style and enhance visual appeal, while optimizing the layout to drive more sales conversions.
Method 1: Customize Product Pages with WooCommerce Website Editor
The website editor feature that comes with WooCommerce is a powerful tool for beginners to modify their pages. Common adjustments can be accomplished by following the steps below:
1. Changing the page layout
- leave for Appearance > EditorThe
![Image[3]-Comprehensive Guide: How to Customize WooCommerce Product Pages to Boost Conversions](https://www.361sale.com/wp-content/uploads/2024/11/20241126092457808-image.png)
- Locate to "templates" and click Start Editing.
![Image[4]-Comprehensive Guide: How to Customize WooCommerce Product Pages to Boost Conversions](https://www.361sale.com/wp-content/uploads/2024/11/20241126092906451-image.png)
Select a product page template:
- locate "Single Product page." template and click to enter edit mode.
![Image [5]-Comprehensive Guide: How to Customize WooCommerce Product Pages to Boost Conversions](https://www.361sale.com/wp-content/uploads/2024/11/20241126094408867-image.png)
- This is the default template for WooCommerce product pages, which can be edited or new templates created as needed.
![Image [6] - Comprehensive Guide: How to Customize WooCommerce Product Pages to Boost Conversions](https://www.361sale.com/wp-content/uploads/2024/11/20241126094738621-image.png)
2. Adjusting colors and fonts
First select the block you need to edit , click on the style icon in the upper right corner to modify the header, button and background colors to match the brand style.
![Image [7]-Comprehensive Guide: How to Customize WooCommerce Product Pages to Boost Conversions](https://www.361sale.com/wp-content/uploads/2024/11/20241126095000204-image.png)
- Adjust the size, thickness and line height of the font to ensure that the text is clear and easy to read.
3. Adding customized blocks
- Click the + sign to insert a new customized block, for example:
- Testimonials
- Related Products
- Frequently Asked Questions (FAQ)
![Image [8]-Comprehensive Guide: How to Customize WooCommerce Product Pages to Boost Conversions](https://www.361sale.com/wp-content/uploads/2024/11/20241126101331769-image.png)
- Set up eye-catching banners for special offers or discounts to grab users' attention.
- Search Banner Block::
- Enter the keyword "Banner" or "Banner".
- Select your desired banner style from the search results, for example:
- Bold Sale Banner(eye-catching promotional banners)
- Hero Section(Full-screen banner with image and caption)
- Insertion of banners::
- Click on the desired banner block to add it to a suitable place on the page (e.g. at the top of the page or above the product list).
- Search Banner Block::
![Image [9]-Comprehensive Guide: How to Customize WooCommerce Product Pages to Boost Conversions](https://www.361sale.com/wp-content/uploads/2024/11/20241126101741170-image.png)
4. Optimization for different types of products
Log in to the WordPress backend and navigate to Products > Add New Products.. Make the following selections on the page:
- Simple Product Page: Spotlight images, short descriptions and "Add to cart"Button.
- Variable Product Page: Use drop-down menus or samples to clearly show change options.
- Grouped Product Pages: Bundle related products and add a "buy together often" option.
Method 2: Extend functionality with the WooCommerce plugin
Wish List Function
- start using "YITH WooCommerce Wishlist", encouraging users to save their favorite items and increase repurchase rates.
![Image [10]-Comprehensive Guide: How to Customize WooCommerce Product Pages to Boost Conversions](https://www.361sale.com/wp-content/uploads/2024/11/20241126102032164-image.png)
Configuration Wishlist Plugin
After installation, you can configure it in detail in the WooCommerce backend:
1. Go to Plugin Settings::
- leave for YITH > Wishlist Setup page.
![Image [11]-Comprehensive Guide: How to Customize WooCommerce Product Pages to Boost Conversions](https://www.361sale.com/wp-content/uploads/2024/11/20241126113259902-image.png)
2. Customize the Wish List button::
- copies: Modify the text of the "Add to Wish List" button, e.g. change it to "Favorite" or "See later".
- placement: Choose where the button should be displayed, support to display on product list page or detail page.
- type: Adjust button colors and fonts to match site style.
![Image [12]-Comprehensive Guide: How to Customize WooCommerce Product Pages to Boost Conversions](https://www.361sale.com/wp-content/uploads/2024/11/20241126114022529-image.png)
![Image [13]-Comprehensive Guide: How to Customize WooCommerce Product Pages to Boost Conversions](https://www.361sale.com/wp-content/uploads/2024/11/20241126114252873-image.png)
3. Setting up the wish list page::
- The plugin automatically generates a wishlist page that can be found in the
Pages > All Pages Find and edit in.
![Image [14]-Comprehensive Guide: How to Customize WooCommerce Product Pages to Boost Conversions](https://www.361sale.com/wp-content/uploads/2024/11/20241126114508653-image.png)
- Modify the page title or add additional content, such as promotional information or shopping guides.
![Image [15]-Comprehensive Guide: How to Customize WooCommerce Product Pages to Boost Conversions](https://www.361sale.com/wp-content/uploads/2024/11/20241126114540221-image.png)
4. Unlogged-in User Support(Upgrade to YITH Wishlist Premium):
- start using Guest Wishlist feature that allows even non-logged-in users to create wish lists.
- When saving a wish list, the system records the user's browser cookie.
5. Share function::
- Enable social media sharing options to support wish list sharing via Facebook, Twitter and WhatsApp.
- Customize the sharing text to guide users to recommend products to their friends.
![Image [16]-Comprehensive Guide: How to Customize WooCommerce Product Pages to Boost Conversions](https://www.361sale.com/wp-content/uploads/2024/11/20241126115039640-image.png)
Add wishlist button to product page
The wishlist button is usually displayed on the product detail page or product listing page and is implemented as follows:
- Enabled by default: The plugin automatically displays the "Add to Wishlist" button below the "Add to Cart" button on WooCommerce product pages.
- Add manually: If you need a more flexible display location, you can use it in the theme
short code ::
<?php echo do_shortcode('[yith_wcwl_add_to_wishlist]'); ?>Method 3: Deeper customization through custom code
Product pages can be customized more deeply with CSS and PHP.
1. Using custom CSS
CSS can be used to modify page styles, for example:
.woocommerce-product-title {
    font-size: 24px;
    color: #333.
}
- Method 1: Add CSS in Appearance > Customizer
- Method 2: Write CSS intosubthemestyle sheet file for the
2. Using WooCommerce Hooks Customized Functions
WooCommerce offers a number of actions and filtersestablish contact withYou can modify the functionality and layout, for example by changing the position of the "Add to Cart" button:
remove_action('woocommerce_single_product_summary', 'woocommerce_template_single_add_to_cart', 30);
add_action('woocommerce_single_product_summary', 'woocommerce_template_single_add_to_cart', 15);
Method 4: Create a Personalized Layout with the Page Builder
look as if Elementor respond in singing Beaver Builder Such drag-and-drop page builders make customizing WooCommerce product pages easy and efficient.

Steps for using Elementor
- Install and activate Elementor.
- On the product page click on "Editing with Elementor."The
![Image [17] - Comprehensive Guide: How to Customize WooCommerce Product Pages to Boost Conversions](https://www.361sale.com/wp-content/uploads/2024/11/20241126143629502-image.png)
- Design layouts using WooCommerce-specific widgets (e.g. product titles, prices, reviews).
![Image [18] - Comprehensive Guide: How to Customize WooCommerce Product Pages to Boost Conversions](https://www.361sale.com/wp-content/uploads/2024/11/20241126143920642-image.png)
- Adjust margins, fonts, and colors to ensure responsive design works well on all devices.
choose correctlyopening (chess jargon)proposal
Grid Layout vs Full Width Layout
- Grid Layout: Suitable for displaying multiple products, it is especially important to keep the image size consistent.
- Full-width layout: More suited to high-end products, with high-resolution images and attractive CTA buttons.
Sidebar vs No Sidebar
- a side-bar (in software): Helpful in providing filters and navigational tools, but avoid cluttering with too much information.
- no sidebar: Suitable for minimalist styles, but make sure there are clear navigation links to other locations.
Frequently Asked Questions
- How do I create a WooCommerce product page?
- Go to your WordPress dashboard and click on "Products > Add New Product", fill in the necessary information and upload an image.
![Image [19]-Comprehensive Guide: How to Customize WooCommerce Product Pages to Boost Conversions](https://www.361sale.com/wp-content/uploads/2024/11/20241126144150678-image.png)
- Where are the WooCommerce product page files?
- Located in the theme folder of the
single-product.phpDocumentation.
- Located in the theme folder of the
- What are the best product page plugins?
- YITH Wishlist,WooCommerce Product Add-Ons respond in singing WooCommerce Variation Swatches It's a popular choice.

Link to this article:https://www.361sale.com/en/27488The article is copyrighted and must be reproduced with attribution.


![Emoji[wozuimei]-Photonflux.com | Professional WordPress repair service, worldwide, rapid response](https://www.361sale.com/wp-content/themes/zibll/img/smilies/wozuimei.gif)
![Emoticon[baoquan] - Photon Wave Network | Professional WordPress Repair Services, Worldwide Coverage, Rapid Response](https://www.361sale.com/wp-content/themes/zibll/img/smilies/baoquan.gif)


No comments