


With the powerful Avada BuilderIt is possible to design very personalized thank you pages and provide personalized information and services to your customers. This article will take you through the steps on how to create a customized thank you page using Avada.

Why design a thank you page?
The thank you page is not only a natural transition for the customer after completing a purchase, it is also theE-commerce websiteon a significant interaction and marketing opportunity. Many webmasters overlook the potential of this page, and with a well-designed thank you page, you can enhance the customer experience, increase brand awareness and drive subsequent sales. Here are a few important reasons to design a thank you page:
1. Enhancing the customer experience
The thank you page is the first thing a customer sees after completing a purchase, and it brings the shopping process to a perfect conclusion. Through personalization, thank you pages can give customers a sense of warmth and recognition, enhancing their goodwill towards the brand.
2. Increasing brand recognition
Thank you pages are one of the last points of contact a customer has with a brand. By including a brand logo, personalized greeting and design style on the page, it can deepen the customer's memory of the brand.
3. Encouraging customers to buy again
On the thank you page, promotional messages, related product recommendations or coupons can be cleverly added to stimulate customers to make repeat purchases. With a well-designedCall to Action (CTA)This can encourage customers to browse more products, sign up for a membership, or take other actions that will increase conversions.
4. Optimize SEO and social media promotion
Thank you pages are a relatively overlooked SEO opportunity on e-commerce websites. By adding elements such as valuable content, social sharing buttons, and customer reviews or testimonials to the page, you can increase the page's exposure and promote interaction on social media.
5. Provision of follow-up support and information
Thank you pages are also a great opportunity to provide follow-up support to customers. Contact information, FAQs, order tracking links, etc. can be displayed on the page to help customers quickly find the support they need.
![Image [2] - Create a personalized WooCommerce thank you page with Avada theme to enhance customer experience](https://www.361sale.com/wp-content/uploads/2025/04/20250414174126484-image.png)
procedure
I. Creating a Layout
Need to create a new layout for the thank you page. Go to Avada Backend, click Avada > Layoutand then click Add New LayoutYou can name it "Woo Appreciation Page" or whatever you want. You can name it "Woo Appreciation Page" or name it according to your needs.
![Image [3] - Create a personalized WooCommerce thank you page with Avada theme to enhance customer experience](https://www.361sale.com/wp-content/uploads/2025/04/20250414171443945-image.png)
II. Setting layout conditions
Next, you need to set the conditions for the use of this layout. Click below the New Layout Management conditions, in the pop-up page, select WooCommerce Thank You Page as the only condition. This way, when the user completes their purchase, they are directed to that page.
![Image [4] - Create a personalized WooCommerce thank you page with Avada theme to enhance customer experience](https://www.361sale.com/wp-content/uploads/2025/04/20250414171535840-image.png)
III. Creating a content layout section
Now it's time to add content. Any layout section can be added to this layout, most importantly the Content Layout Section. Click on the layout of the Select Content button to create a new layout section and name it. Click the Creating a new section After that, click on the Edit icon to go to that layout section.
![Image [5] - Create a personalized WooCommerce thank you page with Avada theme to enhance customer experience](https://www.361sale.com/wp-content/uploads/2025/04/20250414171626330-image.png)
IV. Designing your thank you page
Designing the thank you page is the most fun part of the whole process. It can be customized based on other layout sections andWeb Designthe need to add a header element at the top, or you can choose not to add one.
![Image [6] - Create a personalized WooCommerce thank you page with Avada theme to enhance customer experience](https://www.361sale.com/wp-content/uploads/2025/04/20250414172123758-image.png)
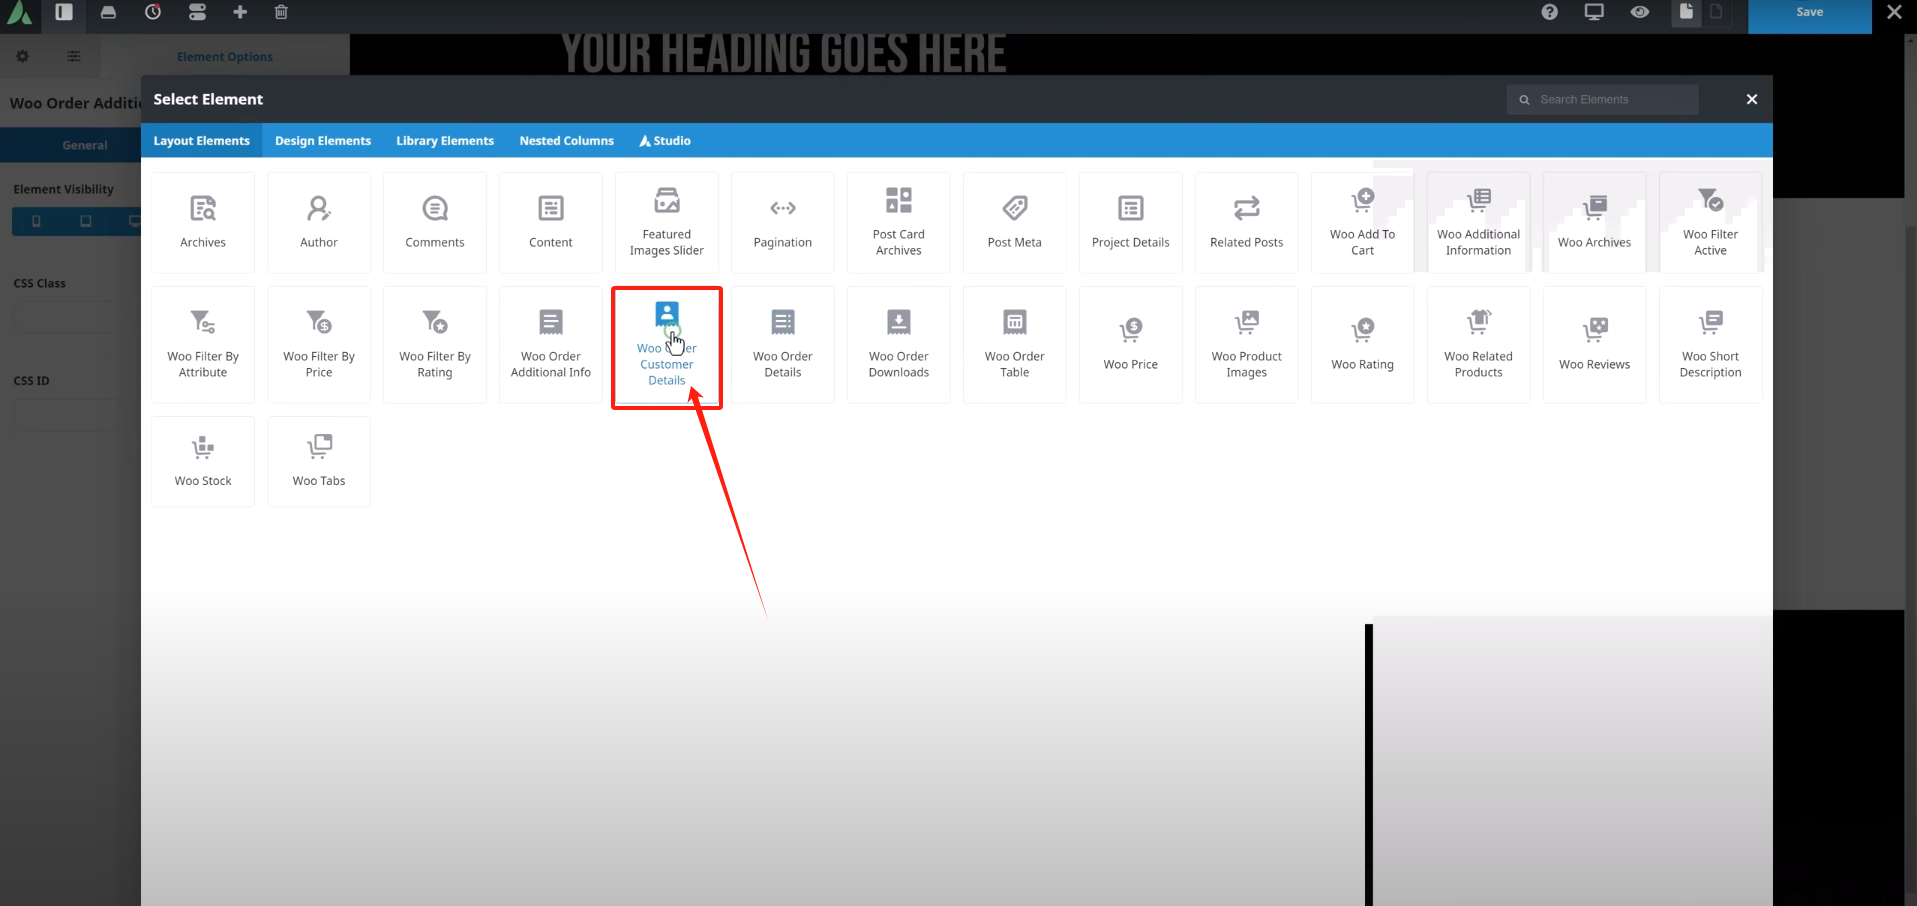
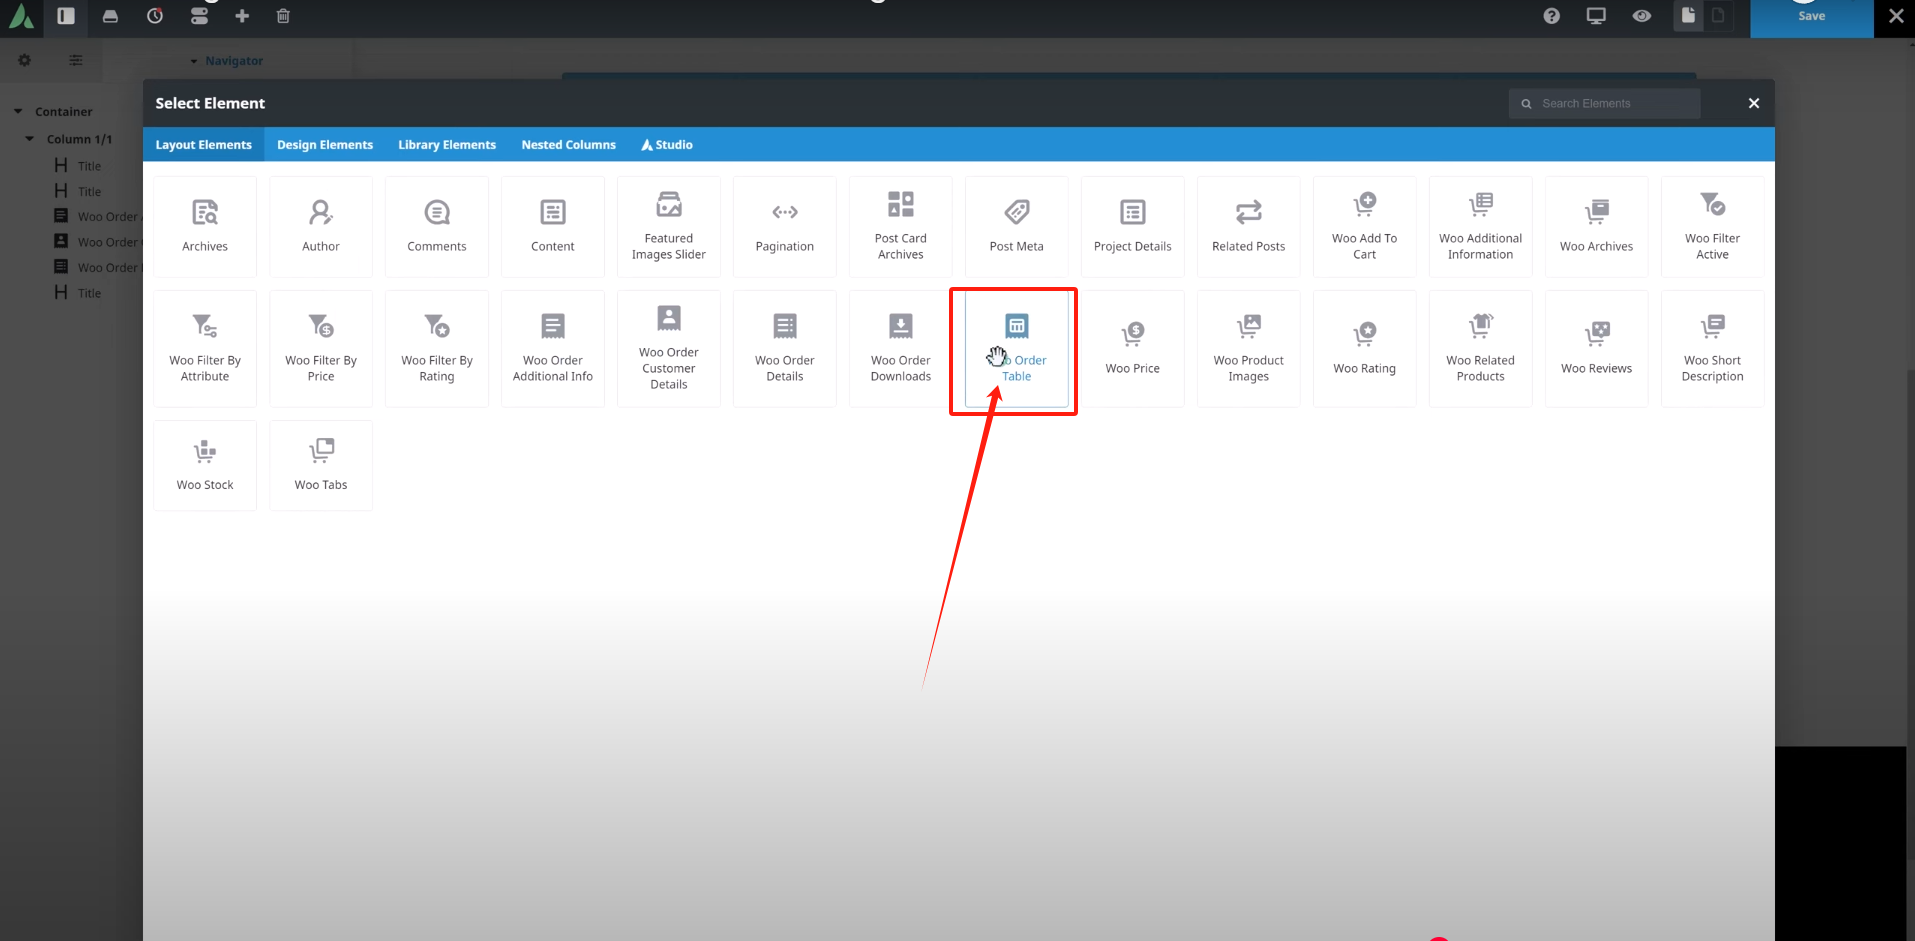
In this content layout section, any element can be added. But the most important thing is to add the following Woo Order Element::
- Woo Order Additional Information Element: Displays payment method information and other relevant information about the order.
![Image [7] - Create a personalized WooCommerce thank you page with Avada theme to enhance customer experience](https://www.361sale.com/wp-content/uploads/2025/04/20250414172334510-image.png)
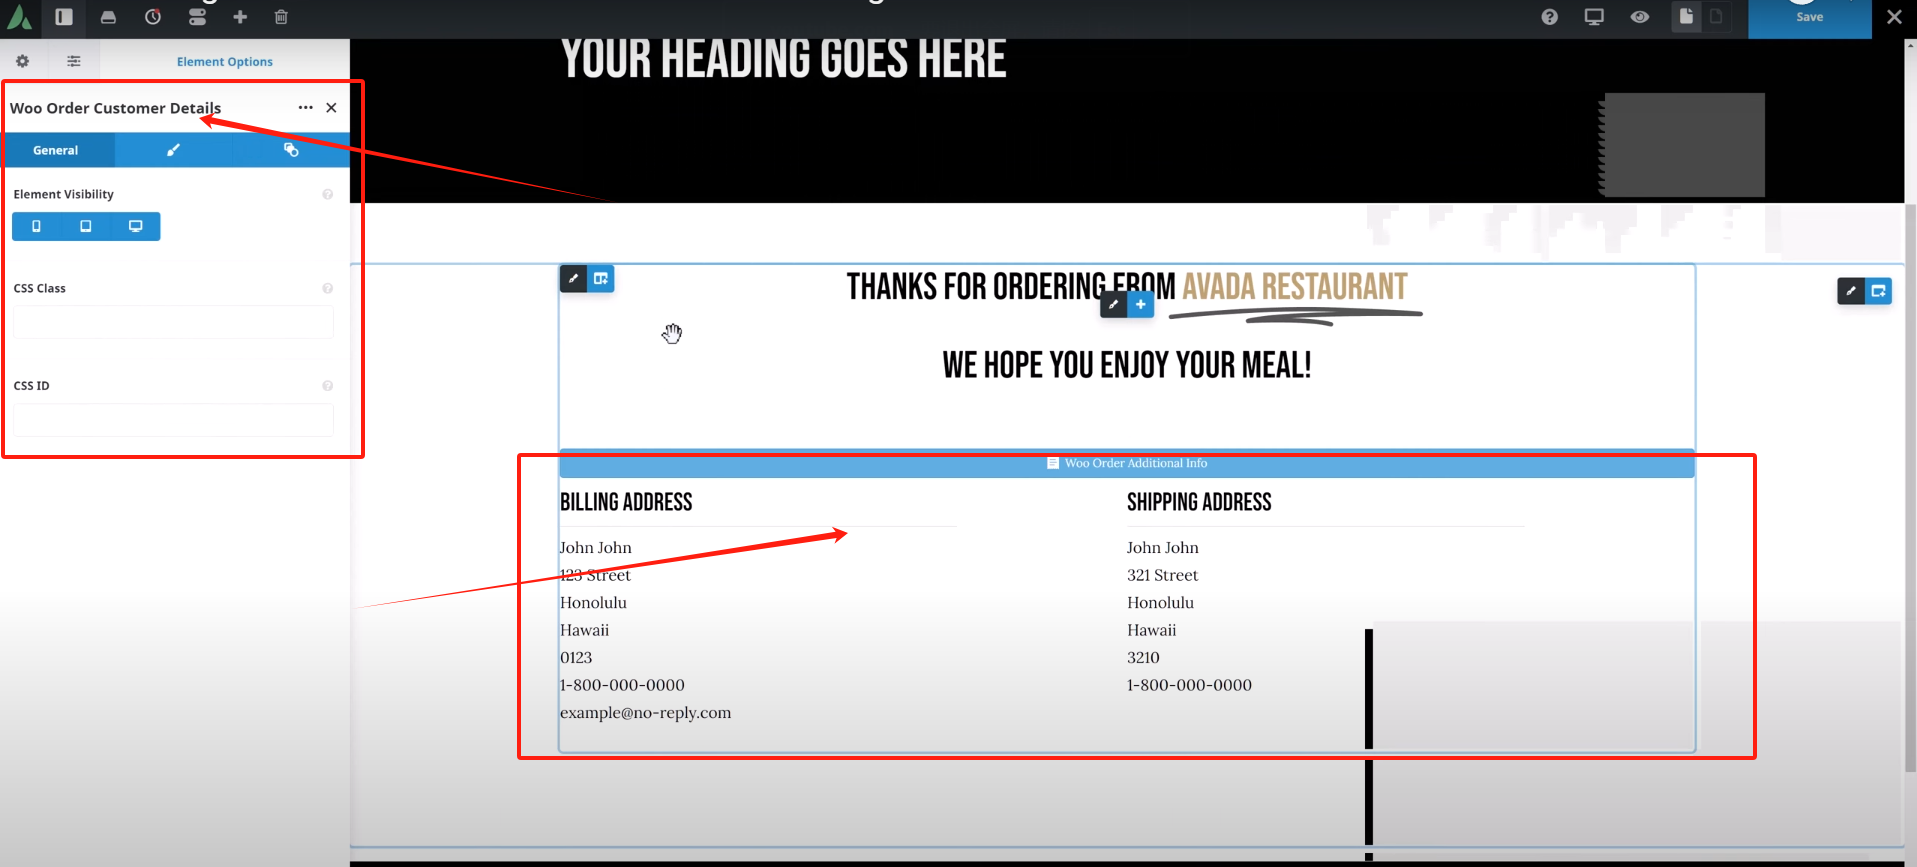
- Woo Order Customer Details Element: Displays the customer's shipping address and billing address in two columns.
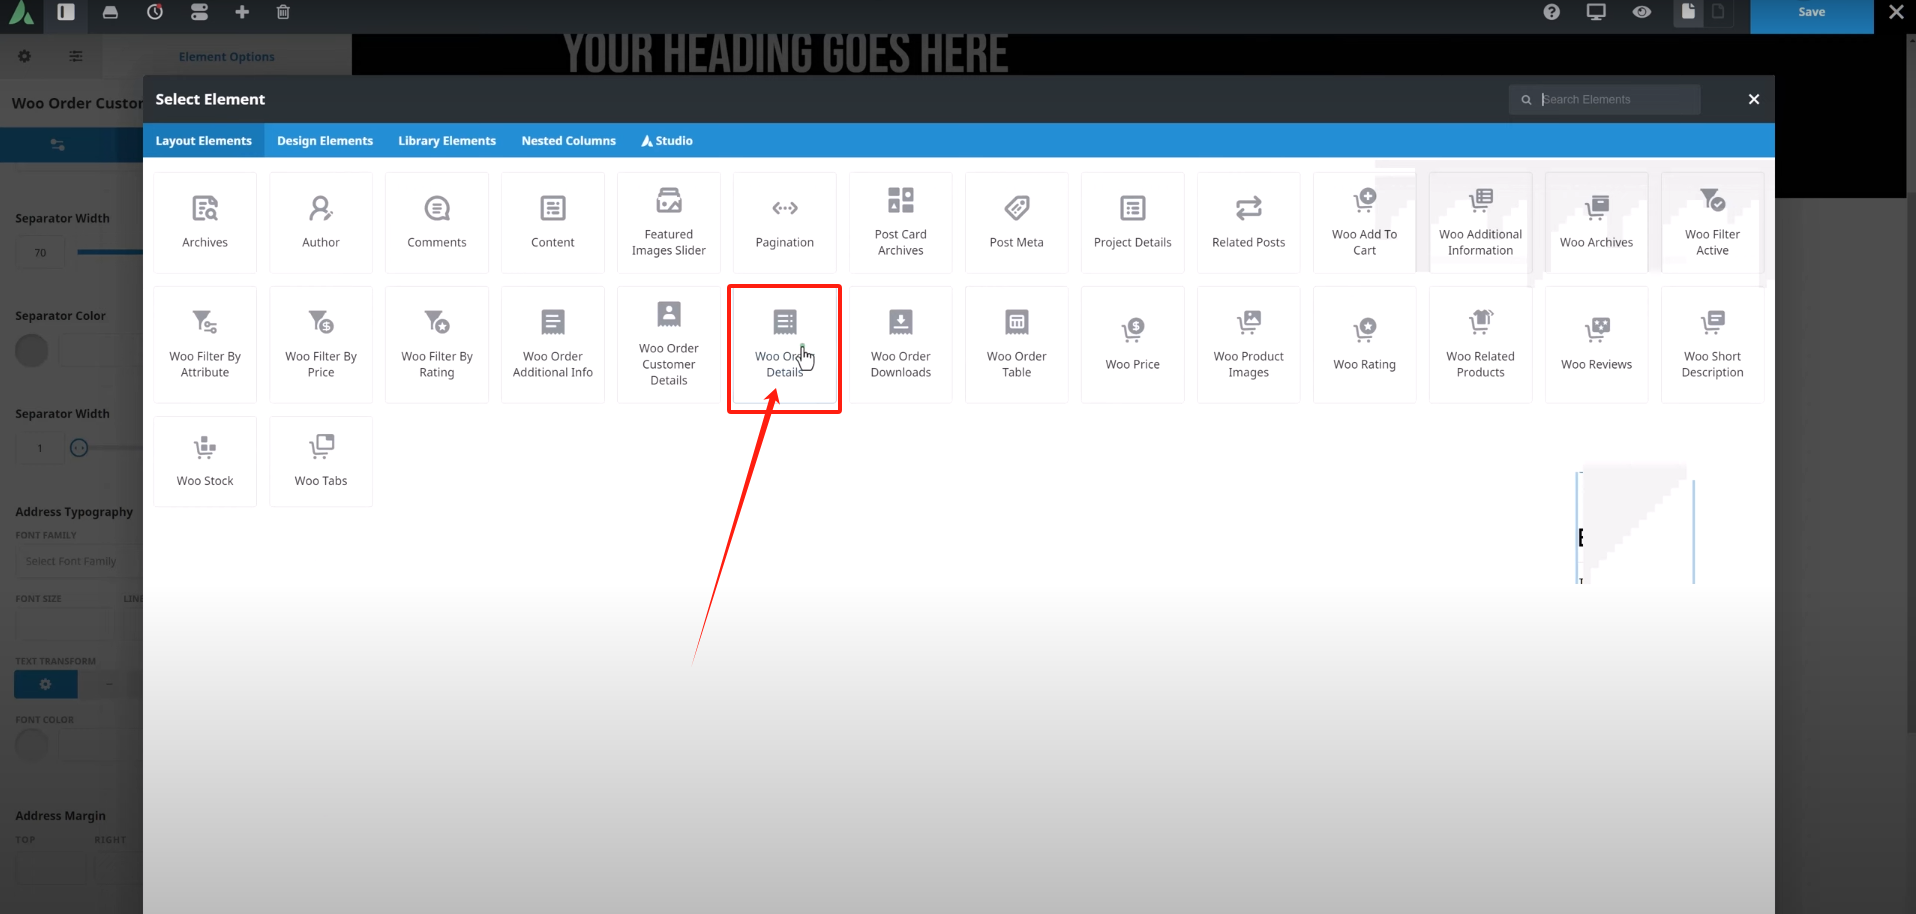
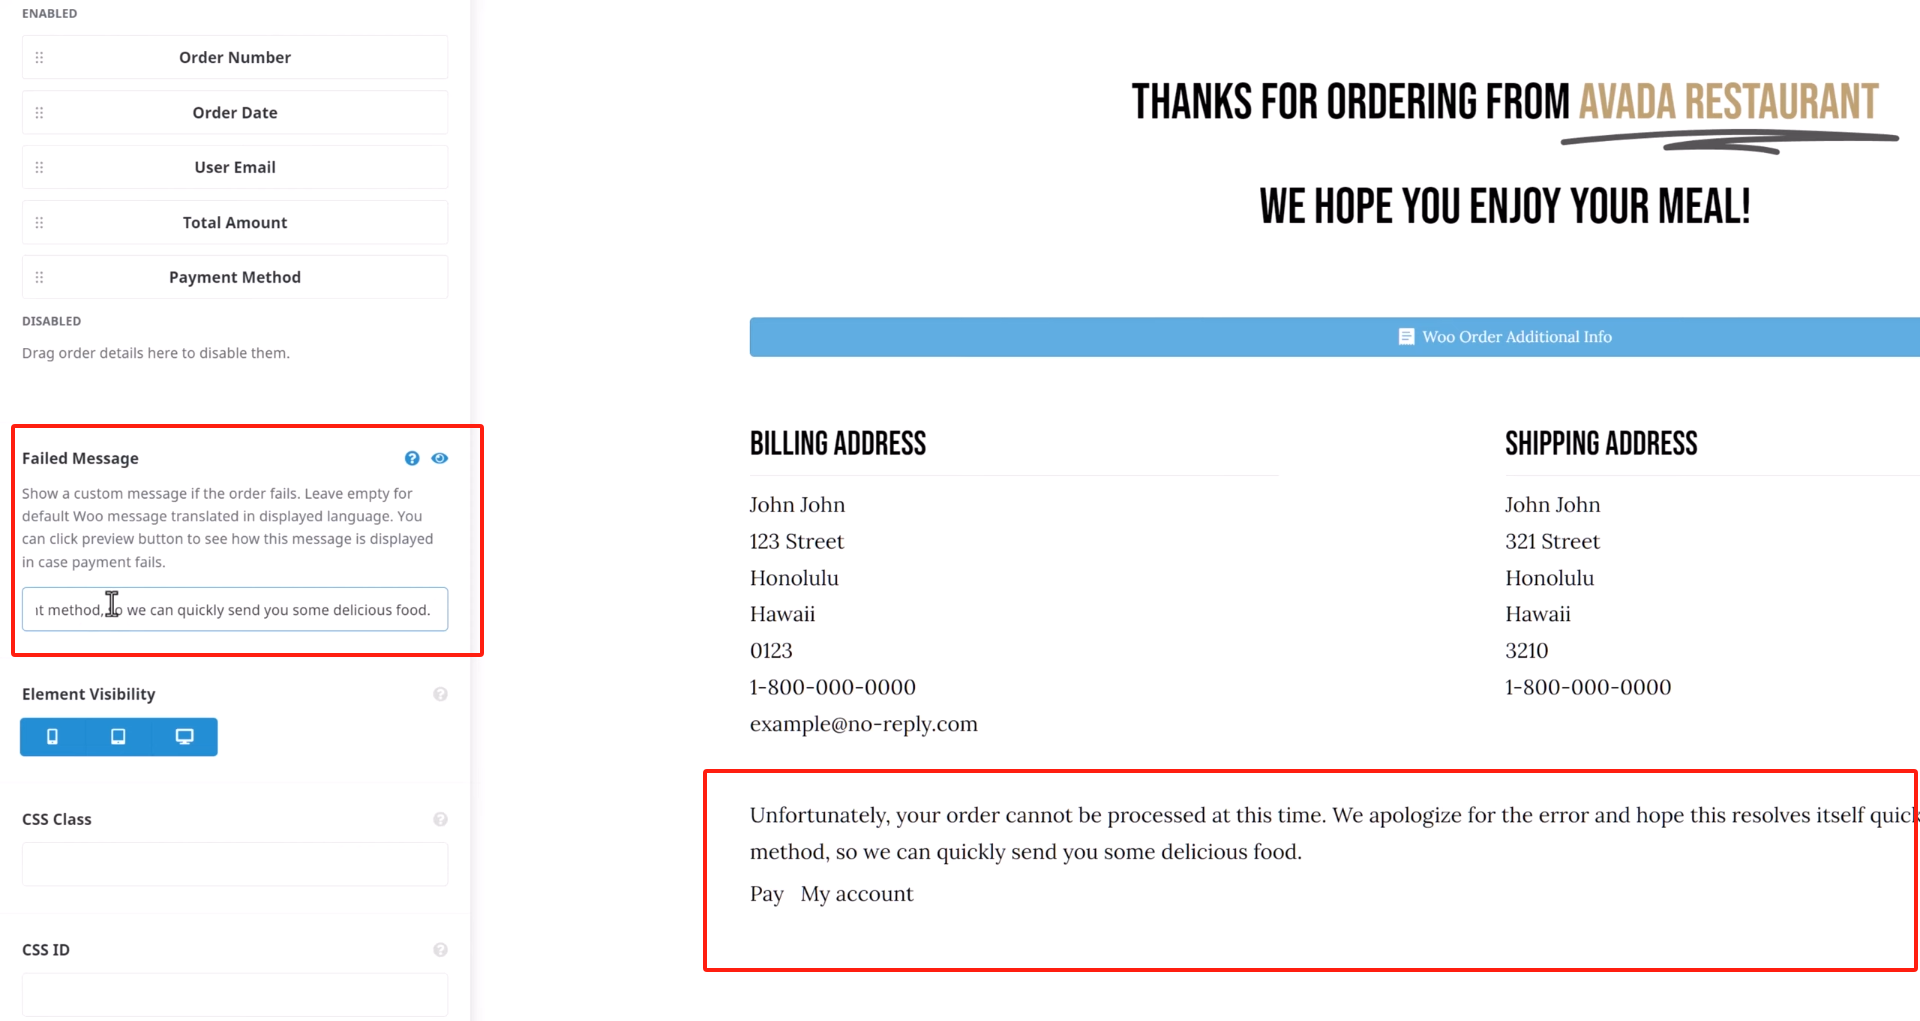
- Woo Order Details Element: Displays the specific details of the order, and you can choose which order details to display.
- Woo Order Form Elements: Presentation of purchased products in an easy-to-read table format.
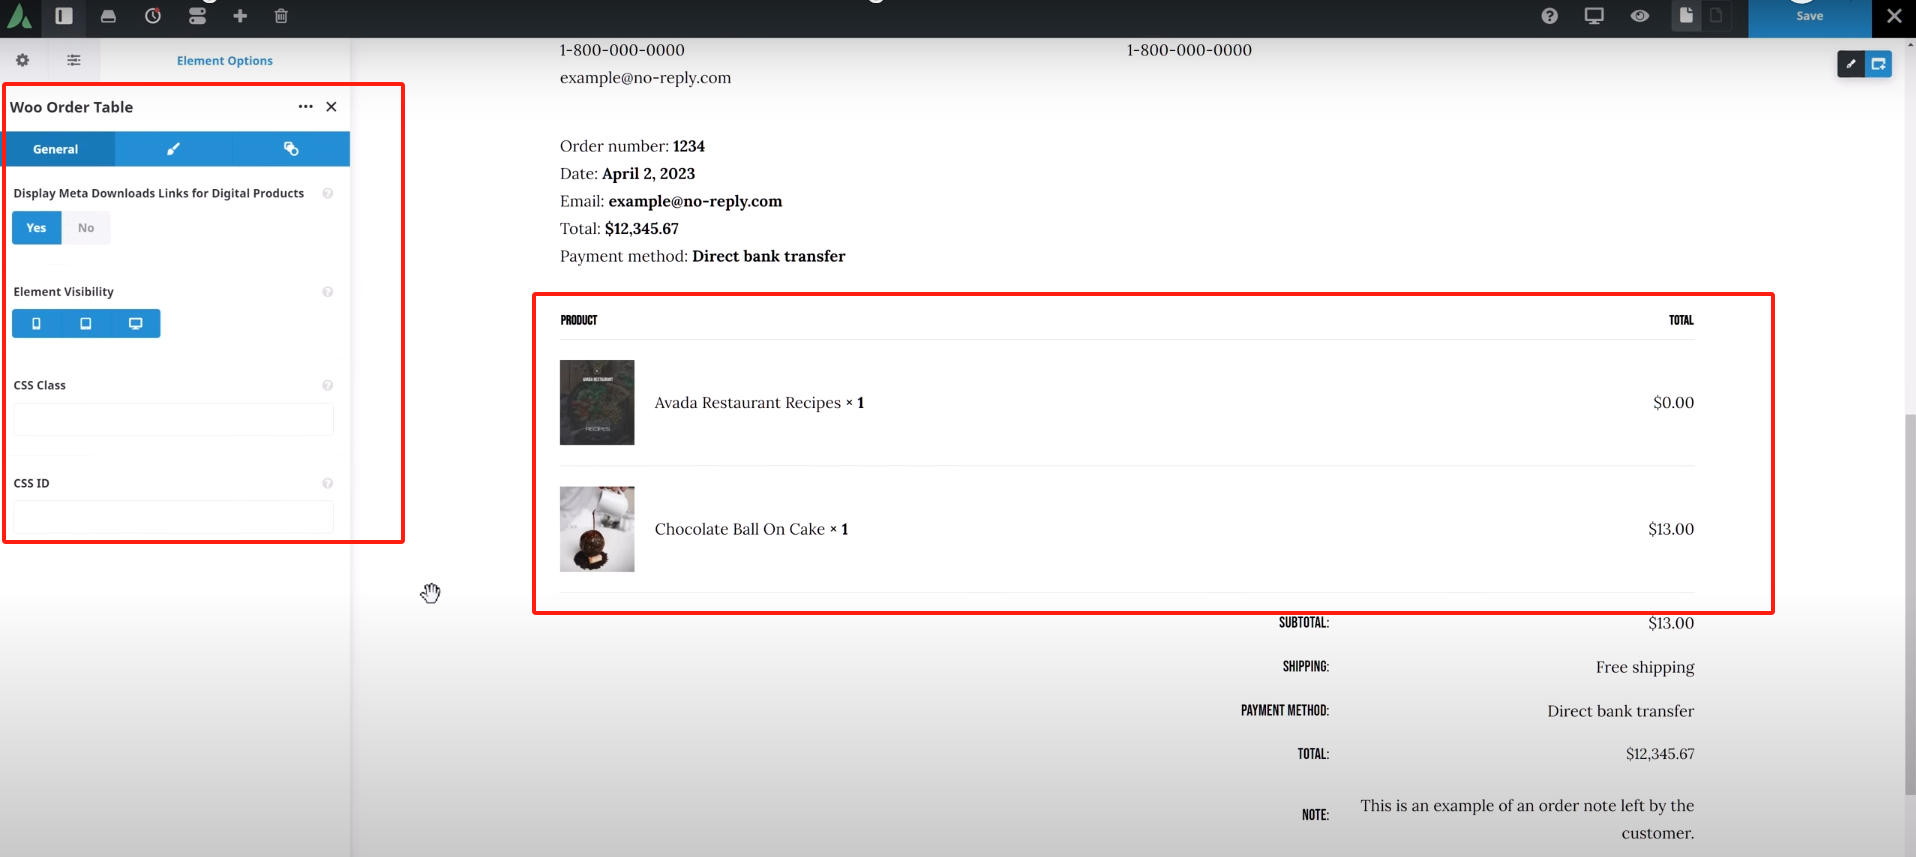
Once you have completed the page design, save the layout section. This way the customized thank you page is created!
V. Front-end display
The next time a user purchases a product and completes checkout, they are automatically directed to the customized thank you page that was created. This provides customers with a personalized service experience that adds to the professional and approachable feel of the site.
![Image [14] - Create a personalized WooCommerce thank you page with Avada theme to enhance customer experience](https://www.361sale.com/wp-content/uploads/2025/04/20250414173148125-image.png)
VI. Troubleshooting
If the customized thank you page doesn't show up during testing, it's likely that other layouts are conflicting with it. You can go ahead and exclude other layouts that use the All Pages maybe pay the bill layout, but the easiest way to fix this is to move the thank you page layout to the end of the layout list.
Just make sure the thank you page layout is located using the All Pages maybe pay the bill After the other layouts of the condition, save the layout order so that it doesn'tclashThe
![Image [15] - Create a personalized WooCommerce thank you page with Avada theme to enhance customer experience](https://www.361sale.com/wp-content/uploads/2025/04/20250414173520539-image.png)
summarize
With the tutorials in this article, it's easy to create personalized WooCommerce thank you pages to provide a better shopping experience for your customers, and use this as an opportunity to increase brand awareness and customer loyalty. For more WordPress related tutorials and information, stay tuned!Photon fluctuation network, has the most comprehensive WordPress tutorials and the most activeWordPress Exchange CommunityThe

Link to this article:https://www.361sale.com/en/50144The article is copyrighted and must be reproduced with attribution.


![Emoji[wozuimei]-Photonflux.com | Professional WordPress repair service, worldwide, rapid response](https://www.361sale.com/wp-content/themes/zibll/img/smilies/wozuimei.gif)
![Emoticon[baoquan] - Photon Wave Network | Professional WordPress Repair Services, Worldwide Coverage, Rapid Response](https://www.361sale.com/wp-content/themes/zibll/img/smilies/baoquan.gif)


No comments