


expense or outlay Loop Grid When building a product listing page, the real challenge isn't "whether it can display," but "where to configure it and how to arrange it neatly." Here's a step-by-step guide based on actual workflow: In Elementor, here's where you place the price, rating, promotion label, and how to handle frequently asked questions.
![Image[1] - Loop Grid Product Card Layout Guide: Price, Rating, and Sale Flash All in One Go](https://www.361sale.com/wp-content/uploads/2025/12/20251229171753966-image.png)
1. First, make sure you are editing the "Loop Item," not the page itself.
The layout of prices, ratings, and promotional tags in product cards is almost entirely handled within the "Loop Item" template.
Operation Path (Two Common Entry Points):
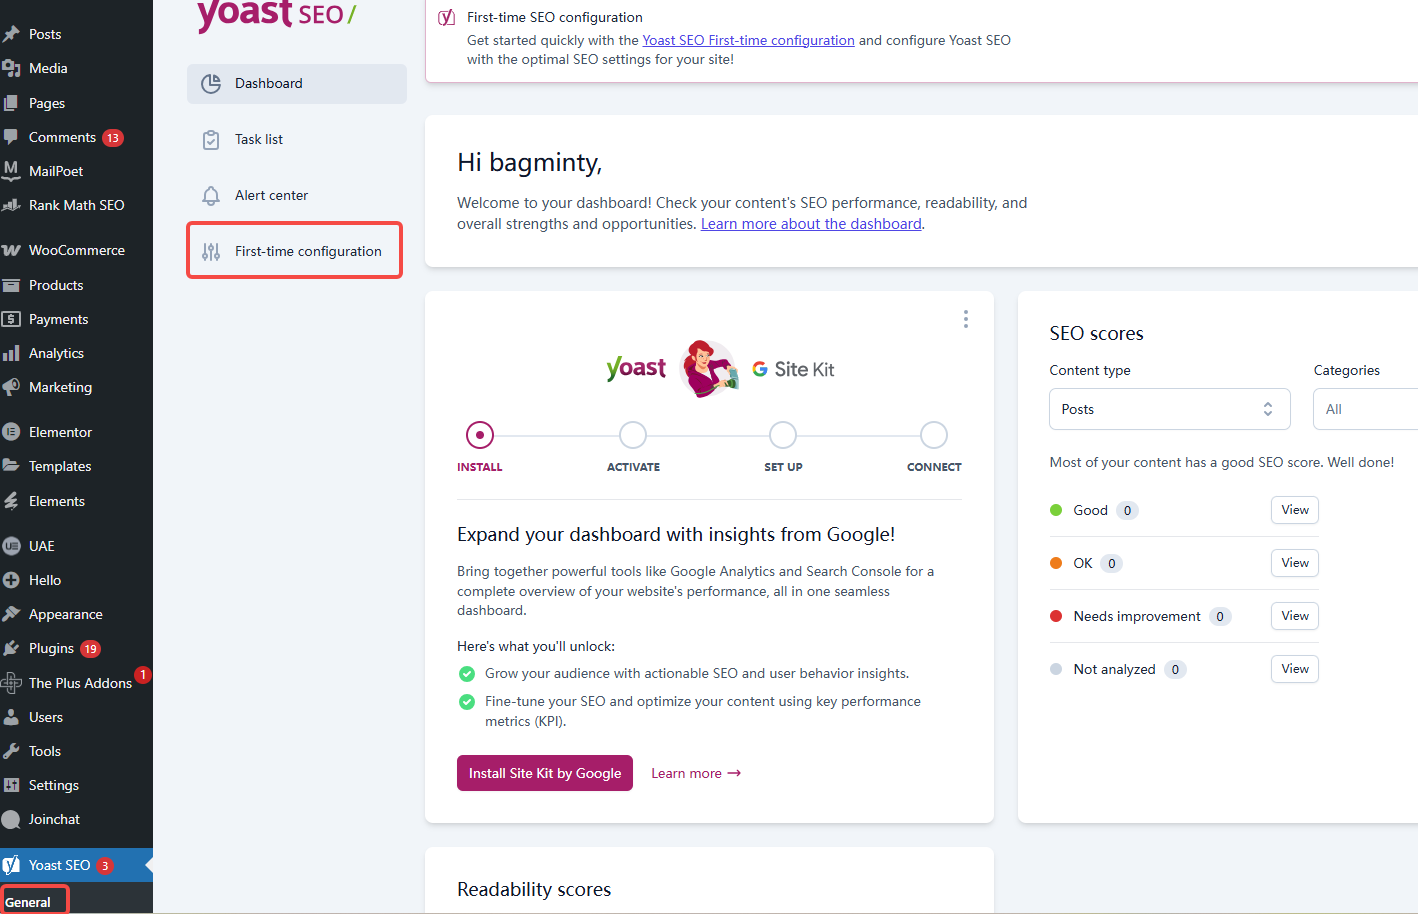
Entry: Access via the template library
- WordPress Backstage → Templates → Theme Builder
![Image[2] - Loop Grid Product Card Layout Guide: Price, Rating, and Sale Flash - All in One Go](https://www.361sale.com/wp-content/uploads/2025/12/20251229170604567-image.png)
- locate Loop Items
- Open the one you're currently using.
![Image[3] - Loop Grid Product Card Layout Guide: Price, Rating, and Sale Flash - All in One Go](https://www.361sale.com/wp-content/uploads/2025/12/20251229151147543-image.png)
Determining whether to enter the Loop Item: What you see is a "single product card," not the full page layout.
2. Where is the price added? Which component is used?
Price display is required. WooCommerce gadget.
Operational Steps:
- Select the position where you want to place the price in the Loop Item.
- Click the top-left corner + Add Component
- Search and add Product Price
![Image [4] - Loop Grid Product Card Layout Guide: Price, Rating, and Sale Flash - All in One Go](https://www.361sale.com/wp-content/uploads/2025/12/20251229151315134-image.png)
Common arrangements:
- Place the rating below the title, and place the price below the rating.
- Place the price in the "bottom conversion zone," near the button.
Price Style Settings Location:
- decide upon a candidate Product Price
- Left side → Style
- Adjustments: Font, size, color, underline, original style
![Image[5] - Loop Grid Product Card Layout Guide: Price, Rating, and Sale Flash - All in One Go](https://www.361sale.com/wp-content/uploads/2025/12/20251229151813872-image.png)
If you want the "discounted price to stand out more":
- Increase the font size of "Sale price"
- Regular price Smaller font size with strikethrough retained
3. Where are ratings added? How are stars and review counts displayed?
The same scoring system is used. WooCommerce Component.
Operational Steps:
- Click in the Loop Item +
- Search and add Product Rating
![Image[6] - Loop Grid Product Card Layout Guide: Price, Rating, and Sale Flash - All in One Go](https://www.361sale.com/wp-content/uploads/2025/12/20251229153348823-image.png)
- Drag below the title or near the price
Rating Style Settings Location:
- decide upon a candidate Product Rating
- Right side → Style
- Adjustments: Star size, text size
![Image[7] - Loop Grid Product Card Layout Guide: Price, Rating, and Sale Flash - All in One Go](https://www.361sale.com/wp-content/uploads/2025/12/20251229162402491-image.png)
Recommended location:
- Place below the headline: Ideal for highlighting word-of-mouth recommendations
- Place below the price: Ideal for emphasizing transactions
Frequently Asked Questions About Rating:
- Some products without reviews won't display, causing inconsistent card heights.
Solution: Leave a fixed spacing for the rating module, or CSS Set the fixed height for the rating container
4. How to create promotional labels? The most reliable method is using "image corner labels."
Promotional labels are best placed as corner annotations on images, so they don't compete for space with prices.
Method A: Use Sale Flash (Promotional Label)
Operating steps: Click the product widget
- Path:Style → Sale Flash → Sale Flash (Toggle)
![Image [8] - Loop Grid Product Card Layout Guide: Price, Rating, and Sale Flash - All in One Go](https://www.361sale.com/wp-content/uploads/2025/12/20251229163025541-image.png)
2) How to adjust subscript position (without using Absolute)
Path:Style → Sale Flash → Position
On the right side of "Position" in your screenshot, there are two small icons:
- Icon on the left: Typically represents Top left(or left side)
- Icon on the right: Typically represents Top right(or on the right)
Tap it to switch the badge alignment to left/right (slight variations may occur across different skins, but this is the control for that position).
![Image[9] - Loop Grid Product Card Layout Guide: Price, Rating, and Sale Flash - All in One Go](https://www.361sale.com/wp-content/uploads/2025/12/20251229163055307-image.png)
Superscript Style Settings:
- Style → Background color, Rounded corners, Font, Padding
![Image[10] - Loop Grid Product Card Layout Guide: Price, Rating, and Sale Flash - All in One Go](https://www.361sale.com/wp-content/uploads/2025/12/20251229163129920-image.png)
5. Recommended Card Layout (Follow this to avoid confusion)
Place components in the Loop Item in this order:
- Product Image(Image container)
- Overlay: Sale Flash or custom badge
- Product Title(Title, two lines truncated)
- Product Rating(Rating)
- Product Price(Price)
- (Optional)Short promotional copy(Free Shipping / Christmas Deal)
- Add to Cart maybe View Product buttons
Alignment Recommendations:
- Full left alignment is more stable.
- Price, rating, and button are aligned on the same visual axis.
6. Where can I adjust the number of columns, spacing, and responsiveness on the list page?
These belong to Loop Grid Set it up yourself; it's not in the Loop Item.
Operational Steps:
- Return to the product list page
- decide upon a candidate Loop Grid
- Left side → Layout
- Adjust Columns
![Image[11] - Loop Grid Product Card Layout Guide: Price, Rating, and Sale Flash - All in One Go](https://www.361sale.com/wp-content/uploads/2025/12/20251229170008900-image.png)
Responsive Settings:
- exist Elementor Switch to Tablet/Mobile view
- Set the number of columns separately
Common Recommendations: - Desktop: 3–4 columns
- Tablet: 2 columns
- Mobile: 1–2 columns
7. The Three Most Common Types of Layout Issues and Their Solutions
7.1 Inconsistent Card Height
Reasons: Differences in the number of title lines, presence or absence of ratings, and length of promotional text.
Solution:
- Title limited to 2 lines and truncated
- Reserve a fixed height for the rating area.
- Keep promotional copy to one line.
7.2 Subscripts Blocking or Misaligning Images
Solution:
- Place the superscript inside the image container.
- Use Absolute positioning + Fixed Top/Left
- Control the inner margin of the superscript; don't make it too large.
7.3 Prices and buttons are misaligned, creating a messy appearance.
Solution:
- Enclose the "rating + price + button" in a container.
- Set the container to Column
- Set uniform spacing for containers
wind up
Loop Grid Price, ratings, promotional tags—the key points are all Loop Item TemplateComplete the setup: Use Product Price for pricing, Product Rating for ratings, and prioritize image overlays (Sale Flash or custom text) for promotional labels. Adjust column count and spacing directly within the Loop Grid itself. Arrange components in the sequence outlined in this article, then configure responsive column settings separately. Your product listing page will instantly become cleaner, more visually appealing, and more conversion-friendly.

Link to this article:https://www.361sale.com/en/84540The article is copyrighted and must be reproduced with attribution.


![Emoji[wozuimei]-Photonflux.com | Professional WordPress repair service, worldwide, rapid response](https://www.361sale.com/wp-content/themes/zibll/img/smilies/wozuimei.gif)
![Emoticon[baoquan] - Photon Wave Network | Professional WordPress Repair Services, Worldwide Coverage, Rapid Response](https://www.361sale.com/wp-content/themes/zibll/img/smilies/baoquan.gif)


No comments