


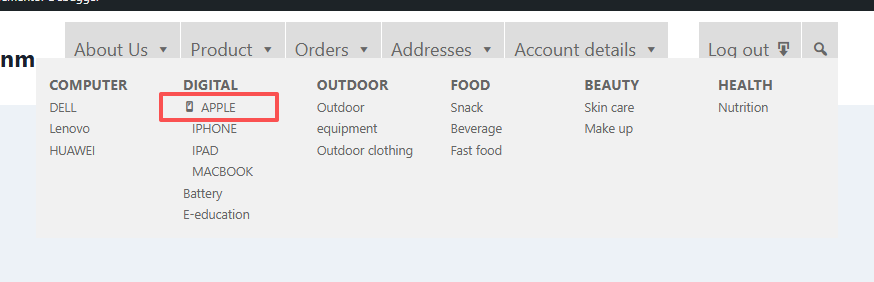
in usingWordPressIn the process of building a website, many users will encounter such a nuisance: wanting to create a website for themenuWhen you are trying to add a beautiful icon to enhance the visual effect of an item, you can't find the setting portal in the background even after repeated searches. This is especially common when you have already installed the powerfulMega Menu PluginAfterward, users often feel overwhelmed by the unfamiliarity of the plug-in interface.
This article provides a thorough setup guide to help quickly master adding icons to the WordPress mega menu for a website navigation that is both aesthetically pleasing and professional.
Understanding how the Mega Menu plugin works
Before getting down to the nitty-gritty, it's important to understand the mechanics of how the Mega Menu plugin works. Unlike WordPress' default simple menus, Mega Menu plugins typically add new settings options to the existing menu management interface. This means that instead of looking for icon functionality in the plugin's main settings page, you should find the new settings area in the familiar Appearance > Menus admin interface.
This design logic allows users to manage regular menus while directly configuring icons and other enhancements for individual menu items without the need to frequently switch between different interfaces.
Specific setup steps in detail
Step 1: Enter the menu management interface
First, log in to your WordPress backend, find "Appearance" in the left navigation bar and click on "Menus". Select the menu you want to edit or create a new one.
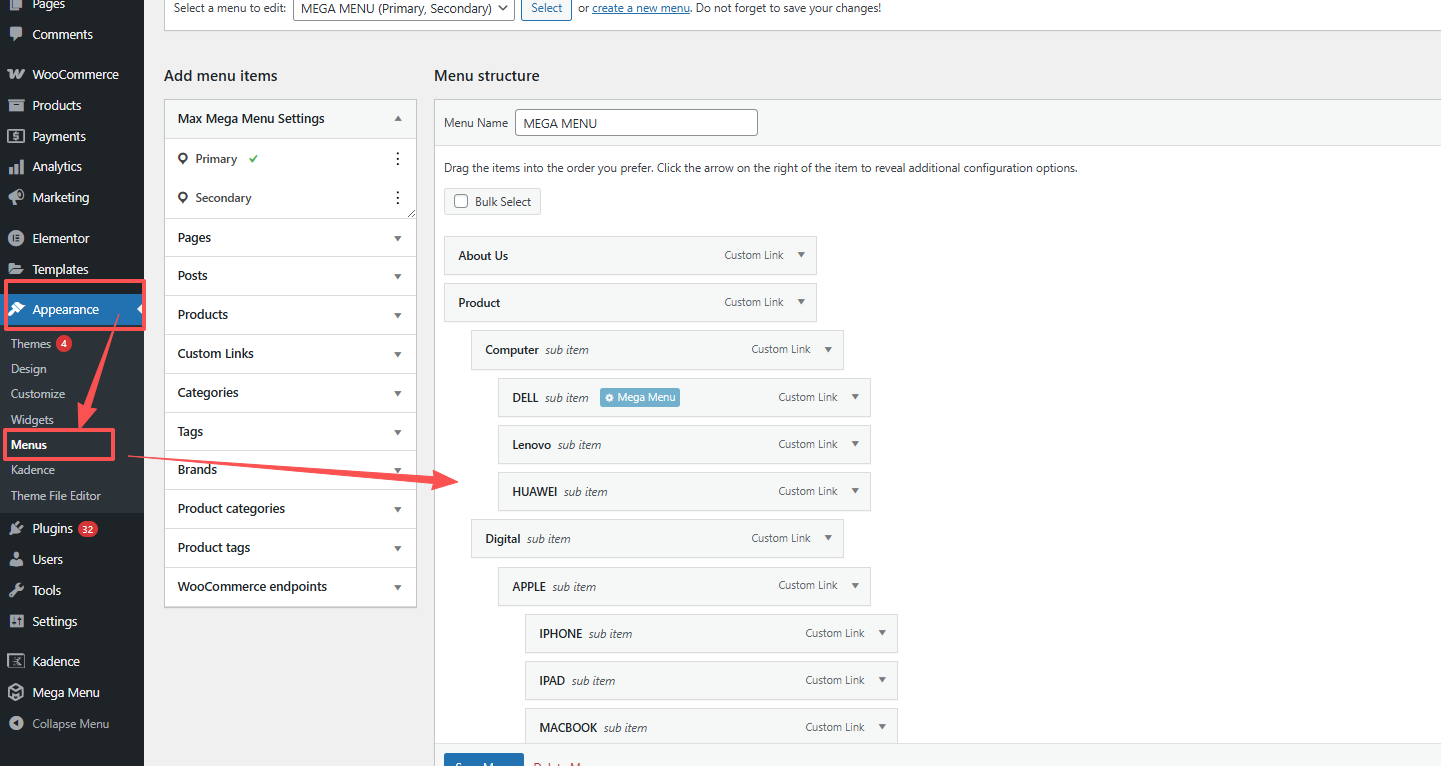
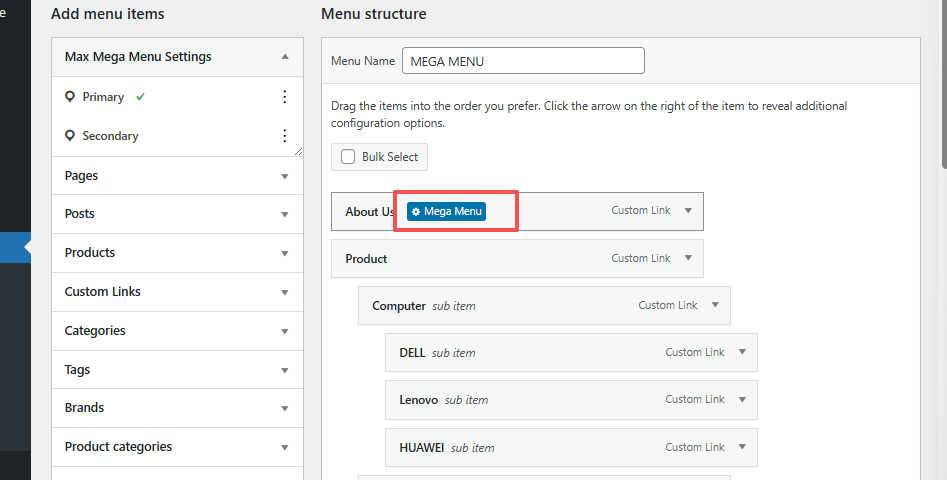
Step 2: Expand the Settings option of the menu item
In the menu structure, find the specific menu item to which you want to add an icon. With Mega Menu installedplug-in (software component)After, there will be some more setting area here than the default WordPress menu, click on Mega Menu.
Step 3: Locate Icon Options
In the expanded settings options, look for the field labeled "Icon" or "Icon".
Step 4: Select or upload an icon
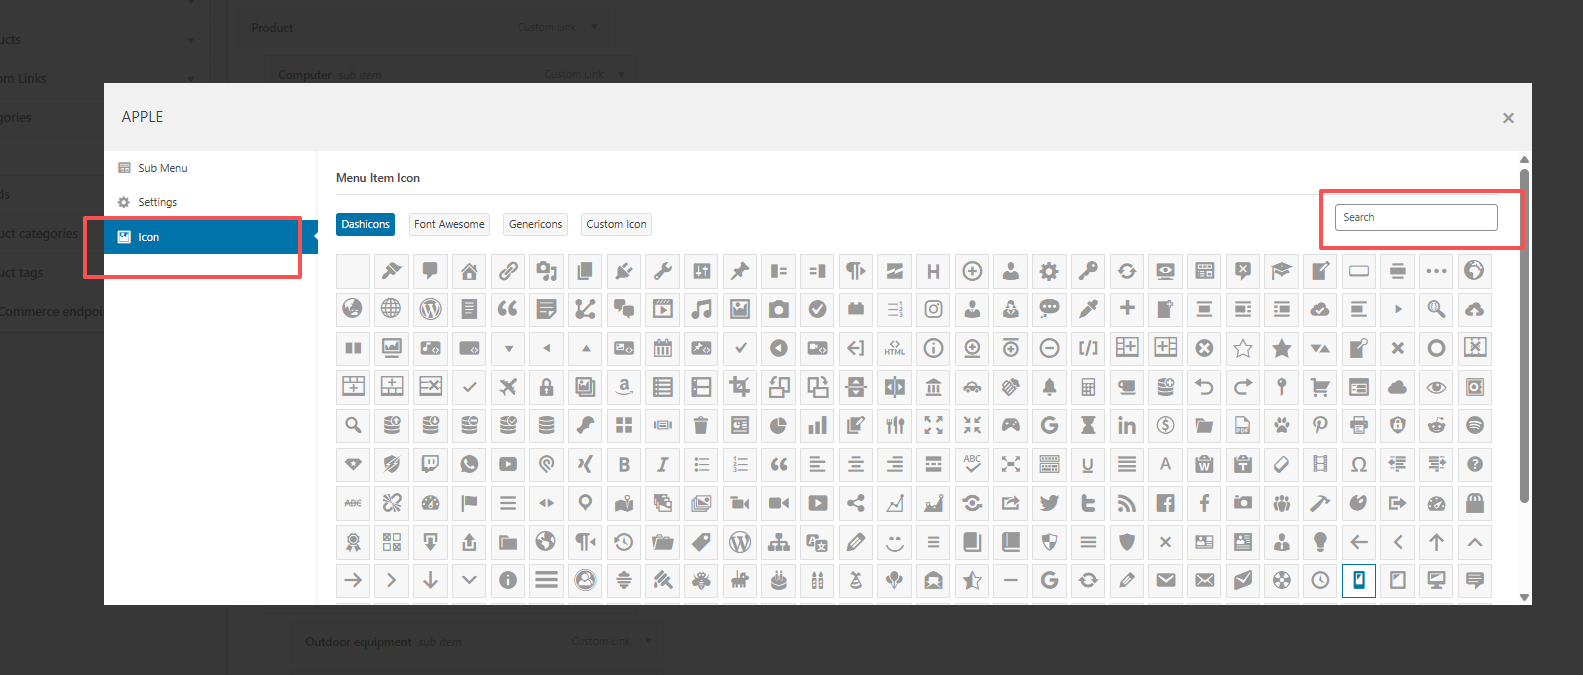
When you click on the icon field, you will usually see the following options:
Built-in icon libraries: many plugins provide a collection of preset icons that can be browsed and selected directly
Customized upload: supports uploading your ownSVGor other format icon files
Font icons: some plug-ins support the use of Font Awesome and other font icon libraries
Step 5: Save Settings
After selecting the icon, be sure to click the "Save Menu" button to make the changes take effect. It is recommended that you go to the front end of the site immediately after saving to verify that the icons are displayed as expected.
With the above steps, the core method of adding icons to the WordPress mega menu has been mastered. This seemingly complex feature is easy and intuitive to operate once you find the right place to set it up. Go ahead and try adding some visual flair to the menu now!

Link to this article:https://www.361sale.com/en/79421/The article is copyrighted and must be reproduced with attribution.


![Emoji[wozuimei]-Photonflux.com | Professional WordPress repair service, worldwide, rapid response](https://www.361sale.com/wp-content/themes/zibll/img/smilies/wozuimei.gif)
![Emoticon[baoquan] - Photon Wave Network | Professional WordPress Repair Services, Worldwide Coverage, Rapid Response](https://www.361sale.com/wp-content/themes/zibll/img/smilies/baoquan.gif)


No comments